When setting up a new Mac, there can be a bunch of settings that need to be changed in order to get the system running the way you like it. That usually involves going through tons of System Preferences panes and app settings—but it doesn't have to.
If you'd rather get everything set up using just one app and a couple of minutes, then you have to get used to firing up Terminal whenever you load a fresh copy of OS X.
- Must See: Create a Bootable Install Drive of OS X El Capitan
- Must See: How to Dual-Boot OS X Yosemite & El Capitan
For those of you who have never used Terminal commands to change up your system settings, I've thrown together a list of my go-to commands to get my Mac up and running fast. As the El Capitan beta is still in an early form, your mileage may vary with these commands if you're using that OS.
Command #1: Always Show Scroll Bars
First is a command that will replace the need to go into your System Preferences to enable your scroll bar to always show. This will make it easier to grab the bar and drag it down a page to scroll faster.
- defaults write NSGlobalDomain AppleShowScrollBars -string "Always"
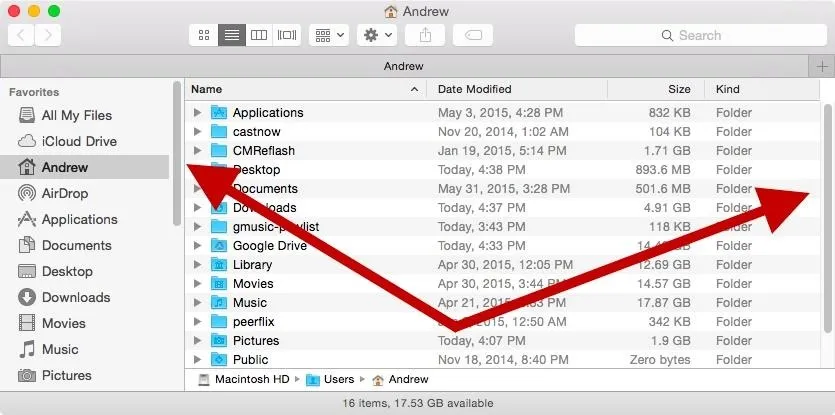
You can also substitute "Always" with "WhenScrolling" or "Automatic."
Command #2: Expand Save & Print Panels by Default
These next commands set the Print and Save dialog boxes to be expanded by default, so you no longer have to click the drop down arrow to select a different printer or destination folder.
Save Menu
- defaults write NSGlobalDomain NSNavPanelExpandedStateForSaveMode -bool true
- defaults write NSGlobalDomain NSNavPanelExpandedStateForSaveMode2 -bool true
(Note: those seemingly large spaces in the commands above are really just one space each.)
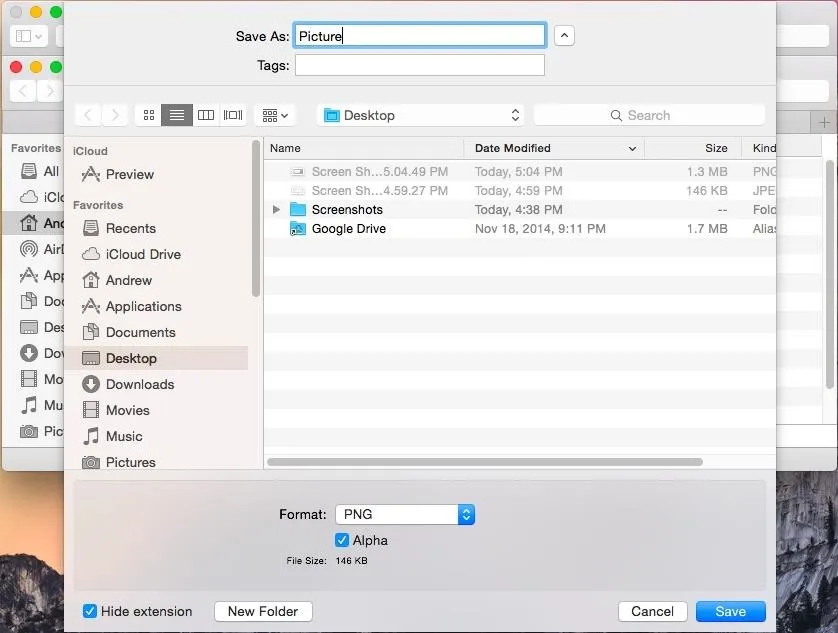
Print Menu
- defaults write NSGlobalDomain PMPrintingExpandedStateForPrint -bool true
- defaults write NSGlobalDomain PMPrintingExpandedStateForPrint2 -bool true
To revert back, simply change the "true" values at the end of these commands to "false."
Command #3: Disable Natural Scrolling
If you not a fan of the "natural" scrolling feature that was introduced in OS X Lion, you can disable it with this command:
- defaults write NSGlobalDomain com.apple.swipescrolldirection -bool false
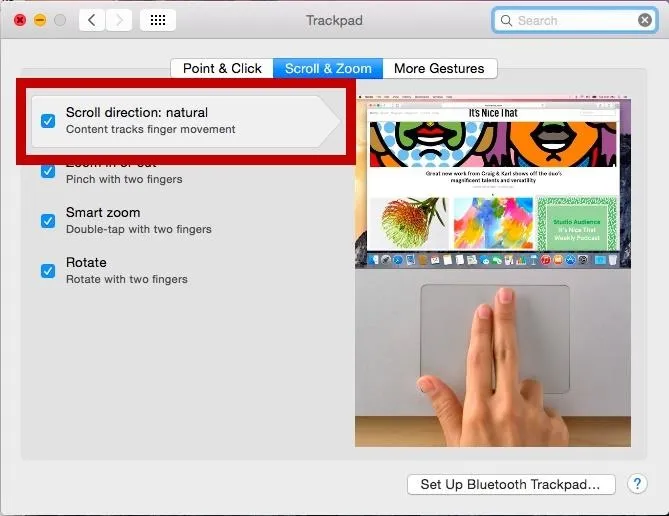
To re-enable natural scrolling, change "false" to "true."
Command #4: Disable Autocorrect
To truly test your spelling skills, you can disable autocorrect with the following command:
- defaults write NSGlobalDomain NSAutomaticSpellingCorrectionEnabled -bool false
To re-enable autocorrect, change "false" to "true."
Command #5: Remove All Default Icons from the Dock
When you get a new Mac, the Dock is flooded with useless icons that can more easily be reached with the Launchpad. To purge it of all the default app icons and start fresh, use this next command:
- defaults delete com.apple.dock persistent-apps
- defaults delete com.apple.dock persistent-others
- killall Dock

Command #6: Prevent Safari from Opening Safe Files Automatically
For some reason, Apple thought is necessary to have Safari automatically open downloaded files if they were deemed "safe." I rarely open files right away, so if you fall into that same category, use this last Terminal command to disable that feature:
- defaults write com.apple.Safari AutoOpenSafeDownloads -bool false
Again, you can re-enable it but changing "false" to "true."
More Terminal Commands to Know
Those were just the commands I use every time I install a fresh OS X version. Do you have any good ones to add? Find out you like using Terminal? Check out the guides below for some more useful ways that Terminal can help you out on your Mac.
- 13 Terminal Commands Every Mac User Should Know
- 6 Tweaks You Should Be Using on Your Mac Right Now
- How to Delete Private Files & Folders from Your Mac Forever
- How to Change the Default Save Location of Screenshots
- How to Run Multiple Instances of the Same App
Follow Apple Hacks over on Facebook and Twitter, or Gadget Hacks over on Facebook, Google+, and Twitter, for more Apple tips.












Comments
Be the first, drop a comment!