


While Touch ID has been a part of the iPhone's legacy since 2013, Apple waited until 2016 to add biometrics to its MacBook lineup, and it's not as impressive. An iPhone with Touch ID can register up to five fingerprints, but Macs can only register a maximum of three per account. If that seems unfair, there's an easy trick to doubling that number, meaning six of your fingerprints could unlock your laptop!
When we say "easy," we mean easy. There are no utilities to download, no Terminal commands to mess with, and it doesn't take a macOS power user to squeeze more functionality out of Apple's rigid fingerprint scanner. Instead, this trick relies on the same method that lets you register all ten of your fingerprints on iPhone, not just five, and it couldn't be simpler to enact on MacBooks with Touch ID.
How the Doubling Trick Works on MacBooks
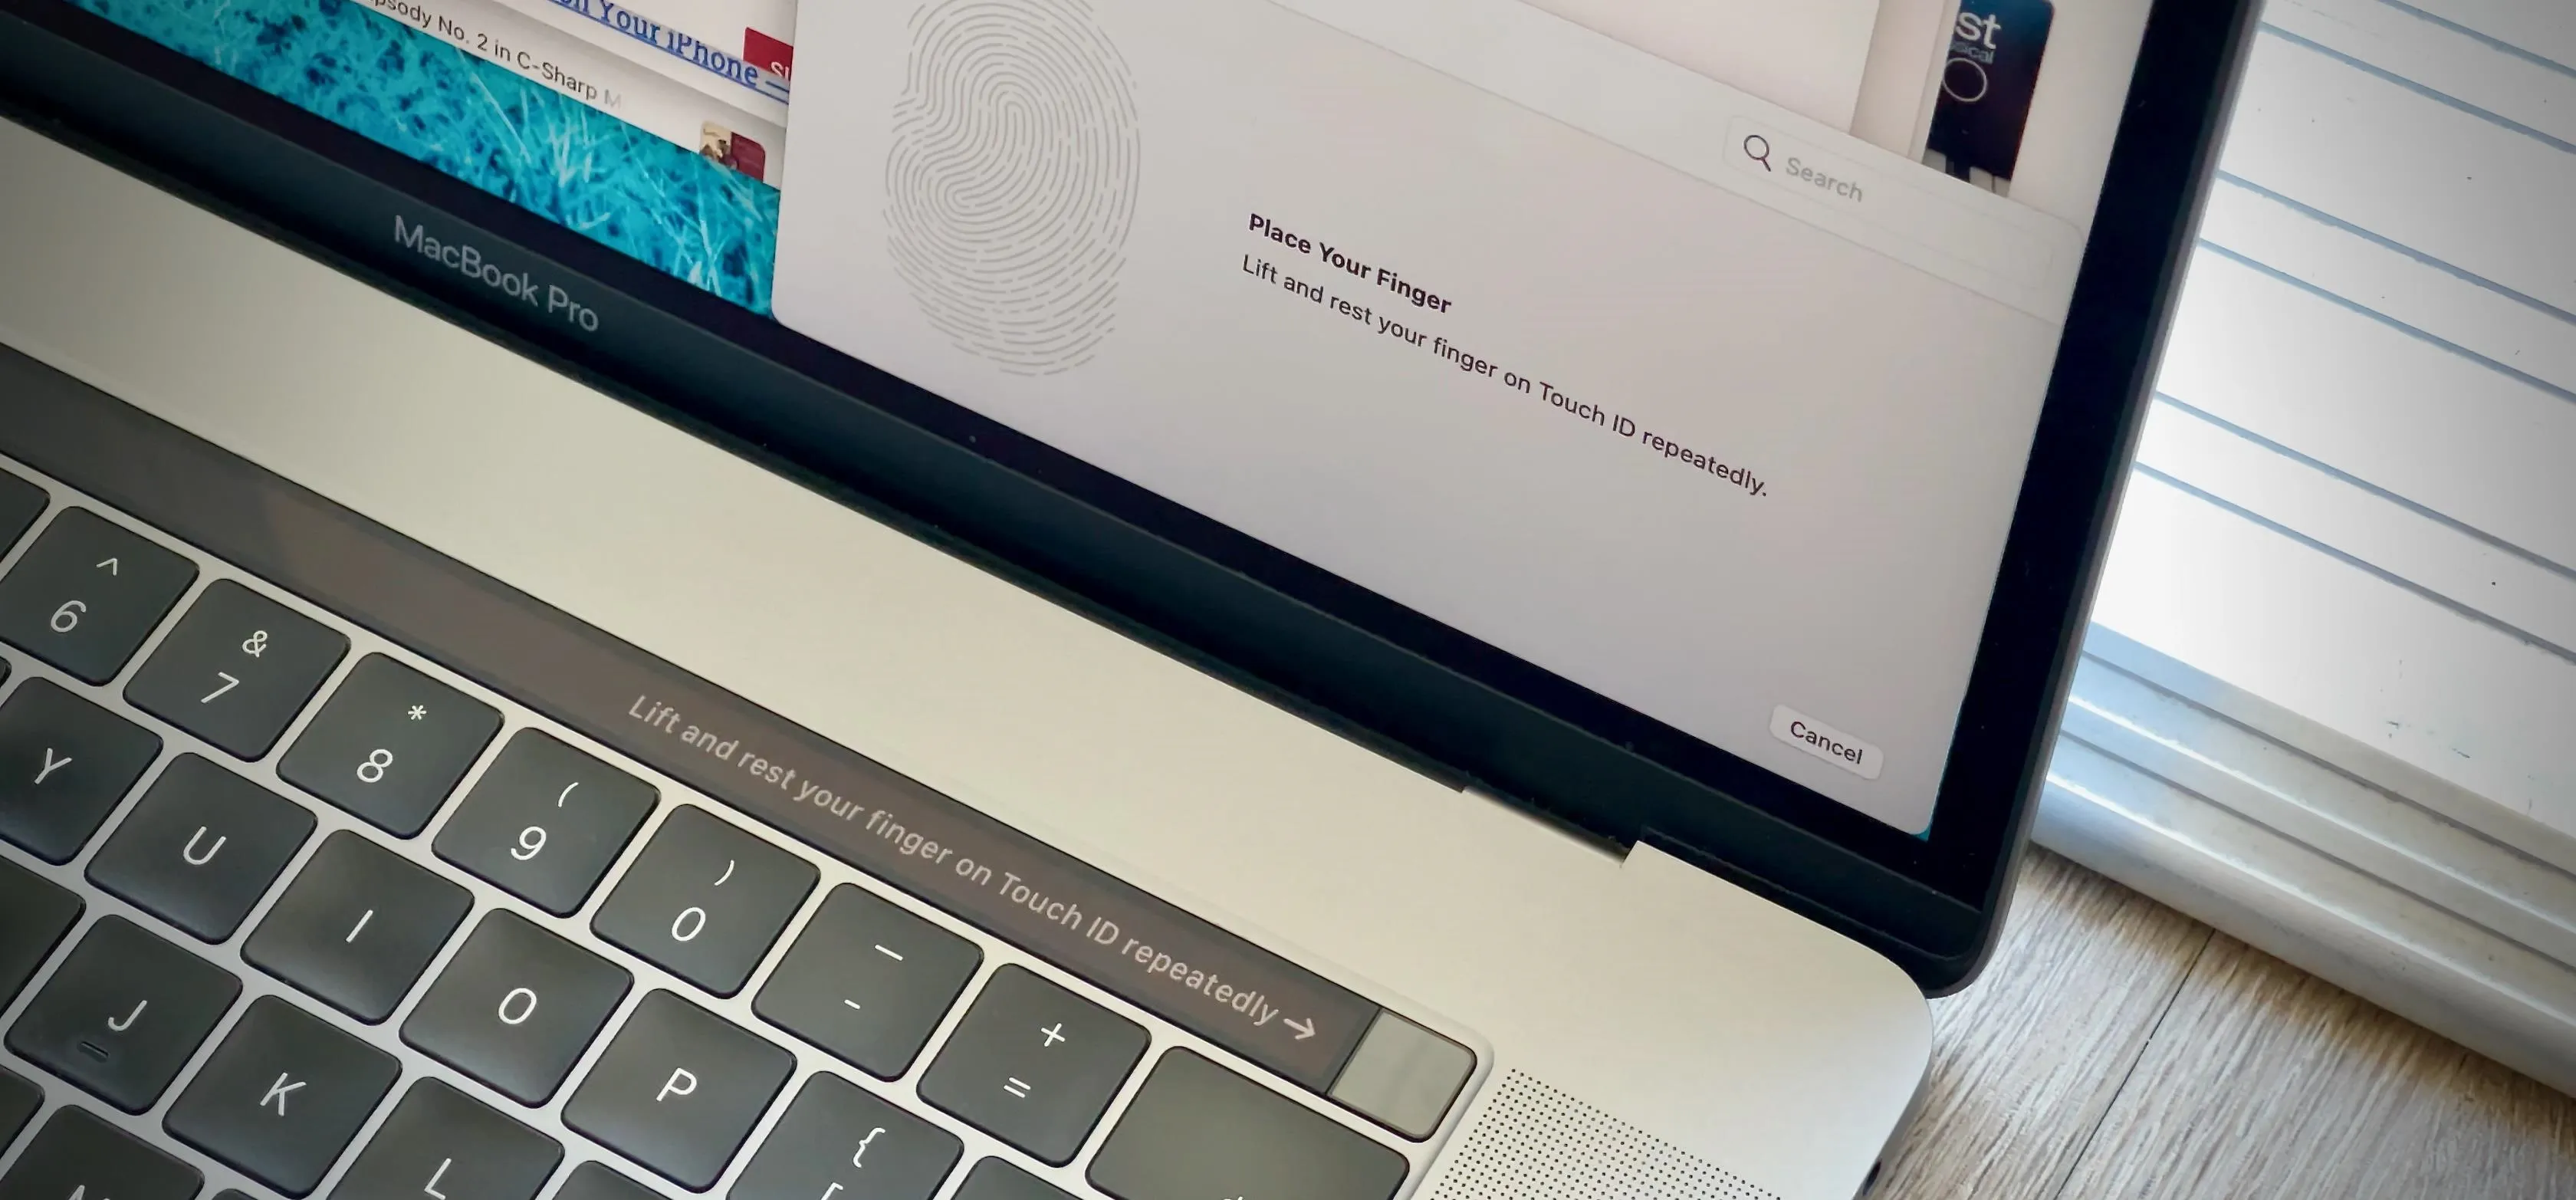
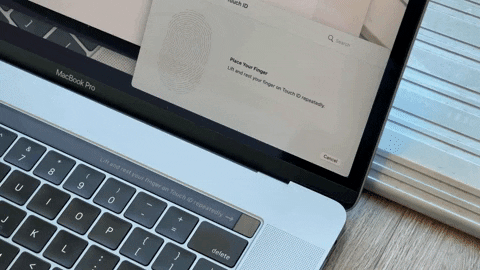
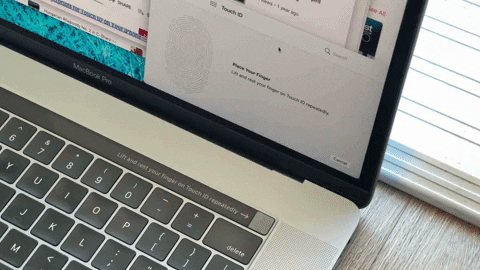
When setting up a fingerprint with Touch ID for the first time, your MacBook Pro or MacBook Air takes multiple scans of each fingerprint to ensure that macOS has a complete picture of your unique print. While this method helps ensure that most unlock attempts are successful, you could easily take advantage of those multiple scans to double up fingerprints.
You would think that switching between fingers during a scan would trigger an error message in macOS that makes you start over, but you can change fingers during the scanning process without any issues. Essentially, macOS is scanning your two fingerprints as one, and all scans are encrypted and stored offline in the MacBook's Secure Enclave.
The result? When the scan is finished, you now have the ability to unlock your Mac with either of the fingers you made the scan with. It only takes up one of your scan slots, so doing the same for the other two slots means you can have a maximum of six fingerprints saved for Touch ID on one user account. Your Mac can save up to five fingerprints across all user accounts, but only up to three per account. Doubled, that means up to six for your account and up to four for another user.
If you share your MacBook and don't have different user accounts for each person, you could use this trick to register fingerprints from different people on one account.
Add a Fingerprint or Delete Existing Prints
To try this out for yourself, open "System Preferences" on your Mac, then click "Touch ID." If there's an available fingerprint slot, click "Add Fingerprint" and enter your user password when prompted.
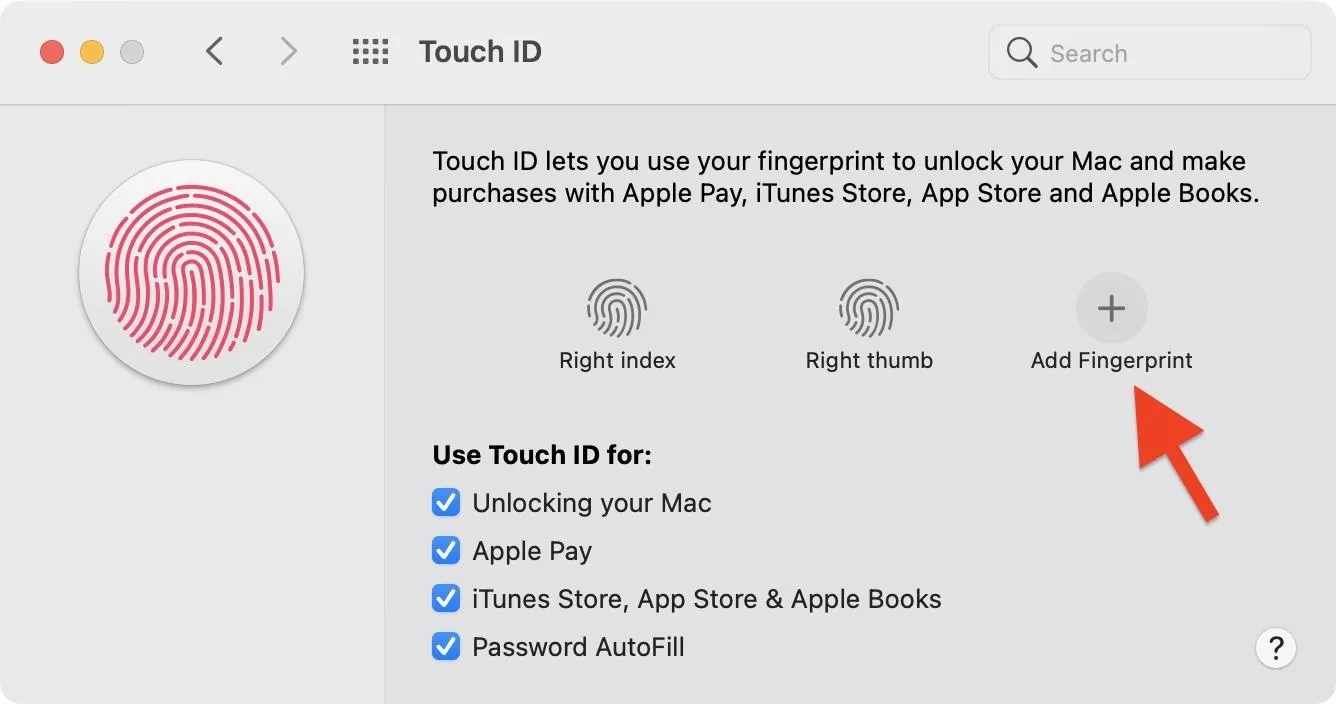
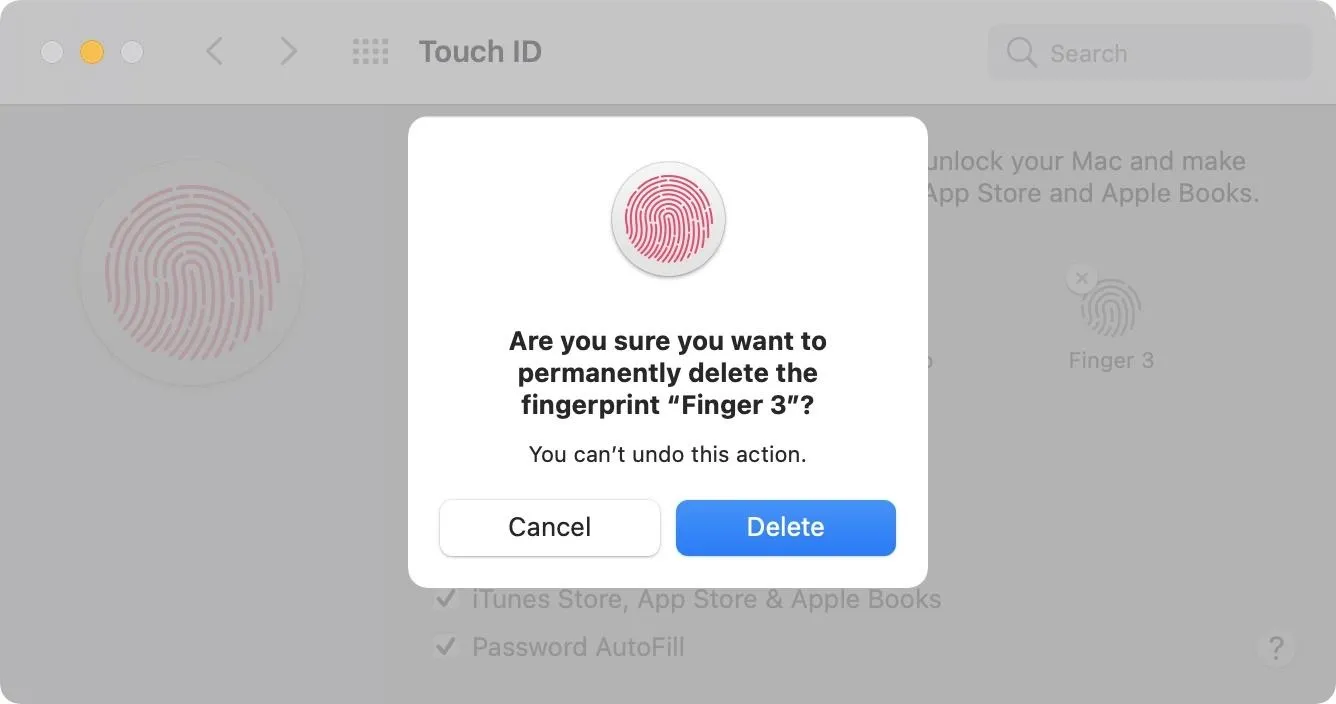
If all slots are full, you'll need to delete one by tapping the (x) that appears when hovering over the scan. Enter your password if prompted, then click "Delete" on the pop-up. Then, go back and click "Add Fingerprint."
Scan Your Two Fingerprints
Choose two fingers to attach to this "single" scan, then start scanning one of them like you normally would. Once macOS tells you to "keep going to capture the edges of your fingerprints," switch fingers and finish the scan that way. Once the scan is complete, you can simply select "Done" to exit.
Alternatively, you can scan one fingerprint after another, alternating fingers between scans. Once again, when the scan is complete, select "Done." This method isn't quite as simple as the first, but it does seem to work just about as well.
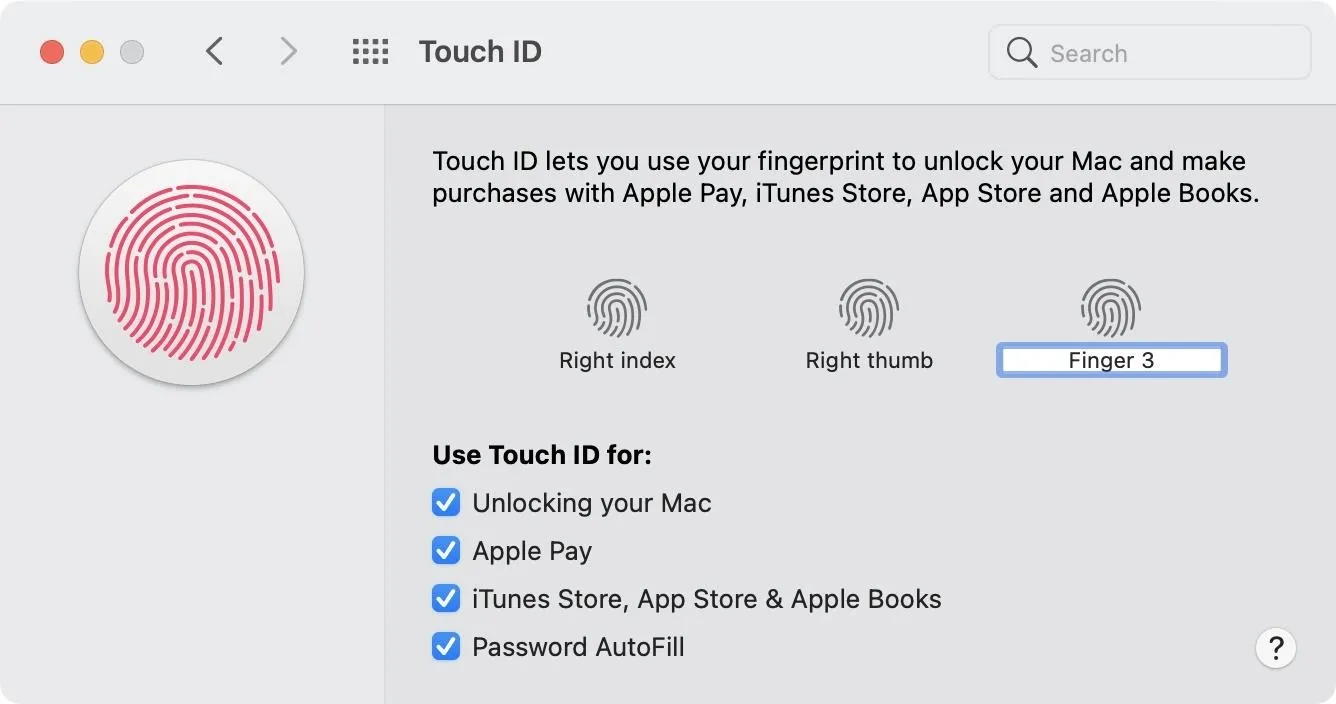
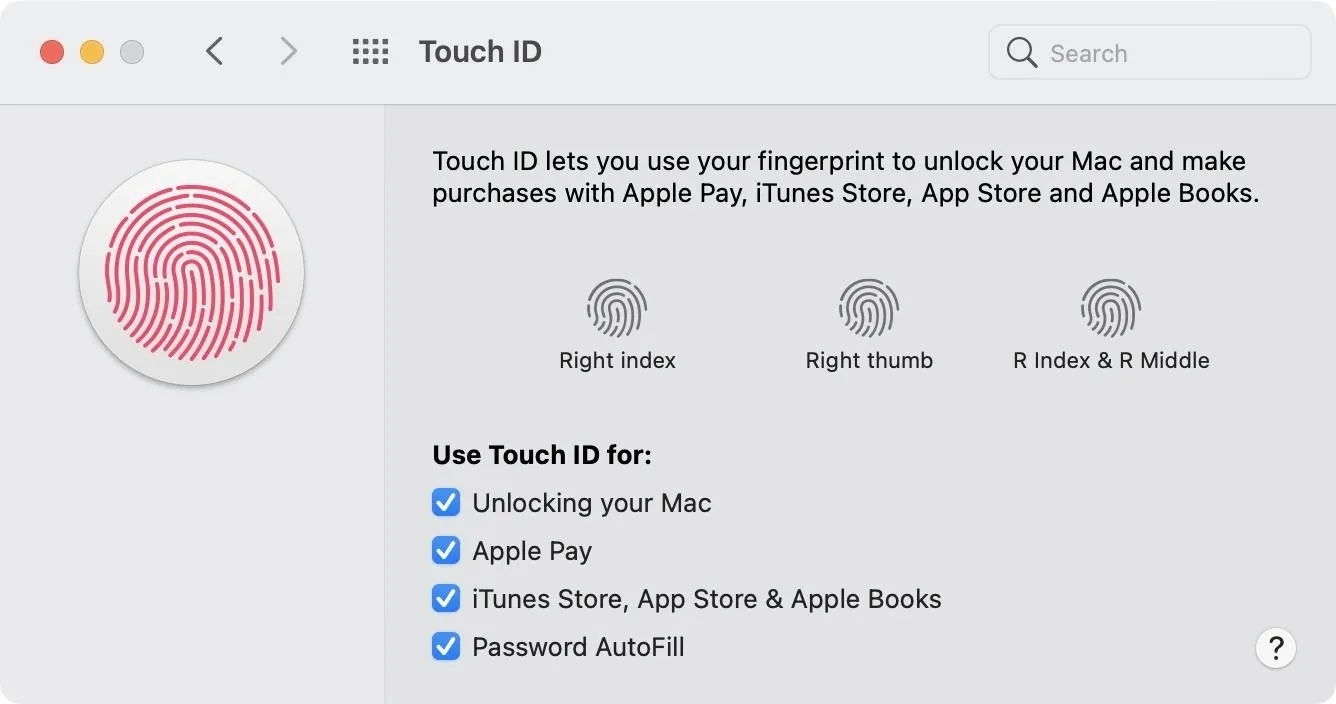
Name Your Fingerprint (Optional)
You might want to consider naming these fingerprints to keep things organized. If you don't, it might be difficult to remember which slot belongs to which two fingerprints.
Click the text that says "Finger 1," "Finger 2," or "Finger 3" under each print. The editor will open, and you can enter a new name for each one. Click outside the text field or hit "Enter" on your keyboard to save each name.
Test It Out!
Now, all that's left to do is to make sure everything went according to plan.
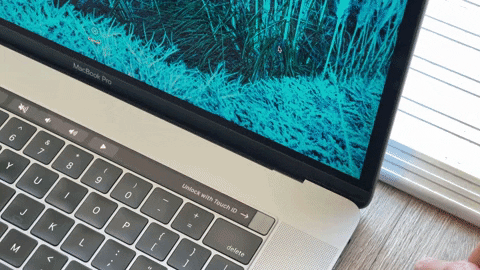
Put your computer to sleep or enter the lock screen, then try scanning with any of the fingerprints you scanned. You could also try buying something from any of Apple's apps, paying for something with Apple Pay, or using AutoFill to fill in passwords for you (as long as you didn't disable those in the Touch ID settings).
If it worked, try a different fingerprint next. If both work, you're all set. However, if something's wrong, you can redo the steps above to try rescanning.
This isn't by any means an official Apple method, but it's worked since the iPhone 5S, the first iPhone to have Touch ID. If Apple hasn't removed this functionality by now, it will likely always remain an unintended, hidden way to double your fingerprints on any Touch ID device.
Cover image, screenshots, and GIFs by Jake Peterson/Gadget Hacks


Comments
Be the first, drop a comment!