When you export an image from the Photos app in macOS, you may not be getting the whole deal. In the export menu, you need to select either JPEG, TIFF, or PNG, and if you don't make any adjustments to the quality settings, it'll likely be compressed. If you need the original full-resolution file or want to get the video that's attached to a Live Photo, there's a simple way to do it.
You can get the original file by dragging and dropping in conjunction with a keyboard modifier, or you can get the original by using the "Export" menu. The drag-and-drop method is faster, but the "Export" menu gives you more choices. Exporting your images in their original formats can be useful for a wide variety of scenarios, especially when working with high-quality photos in other apps.
Drag & Drop Original Files
Inside the Photos app, press and hold the Option or Alt key while dragging and dropping the image you want to export to the Finder or desktop. It'll be exported in its original format and uncompressed. If it's a Live Photo, it will export the image plus the .mov video file.
If you've done any editing inside the Photos app, such as cropping, noise reduction, sharpen, and so on, using the keyboard modifier will strip all of the edits away.

Regular export with a basic crop (left) vs. Alt/Option export of the original photo (right).


Regular export with a basic crop (left) vs. Alt/Option export of the original photo (right).

Export Original Files + Metadata
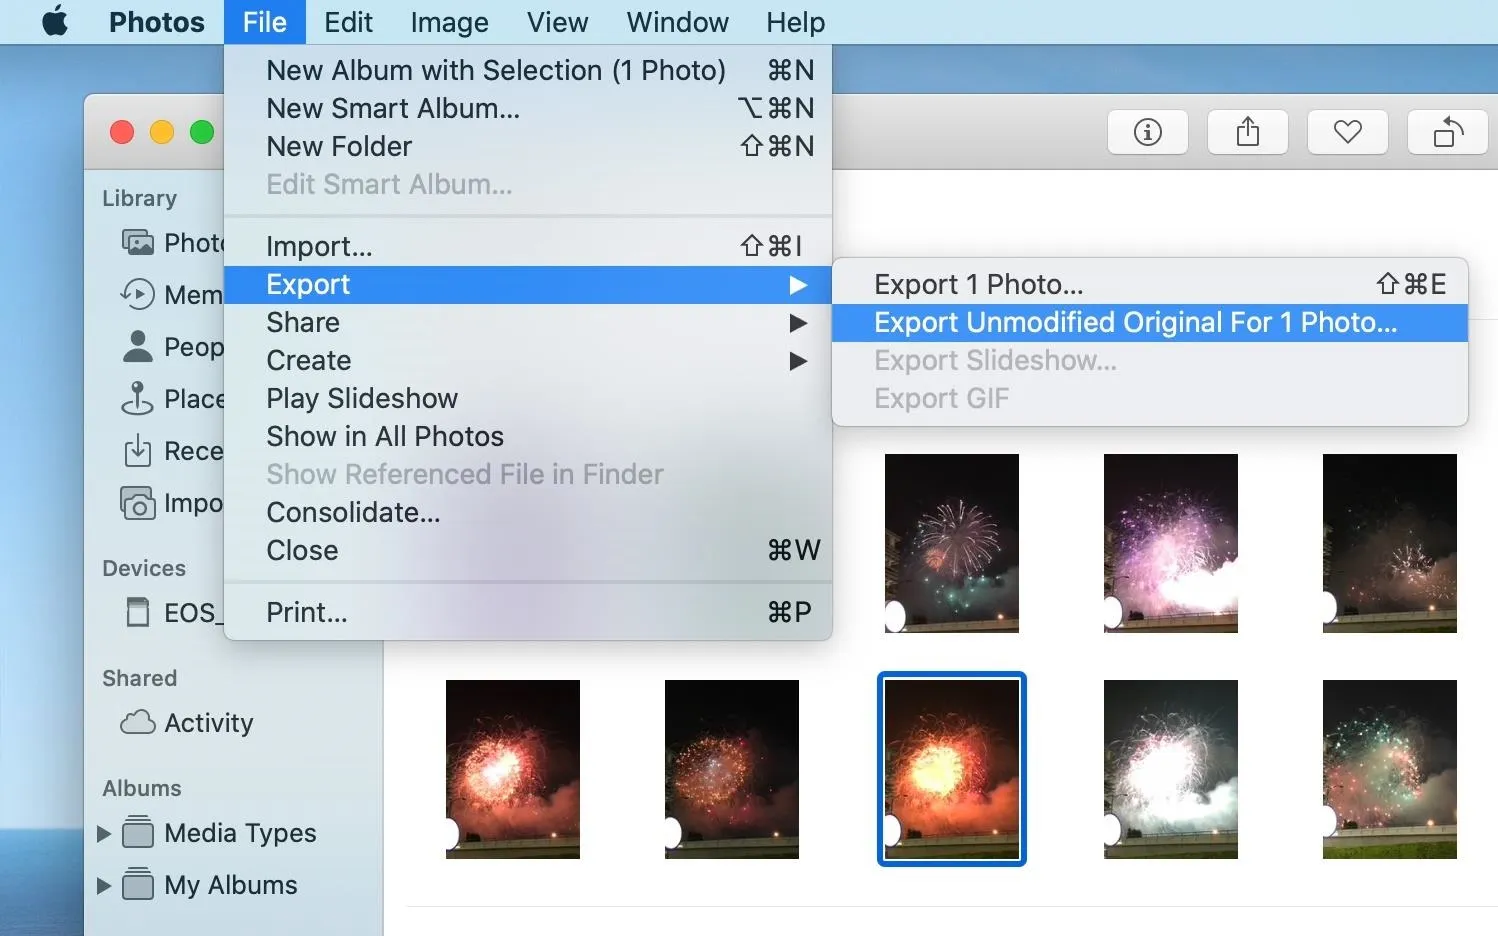
Exporting images through the "Export" menu gives you a lot more control over the exporting process. In the menu bar in Photos, select "File," then "Export." Now, instead of choosing "Export # Photo" like you usually would, click on "Export Unmodified Original for # Photo."
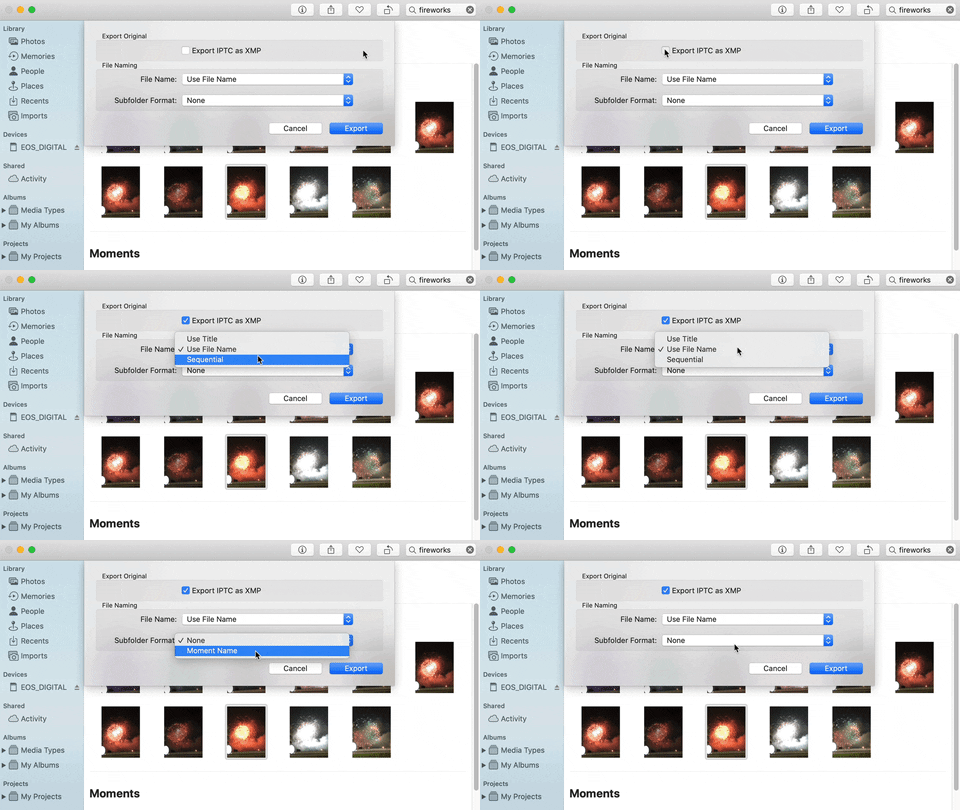
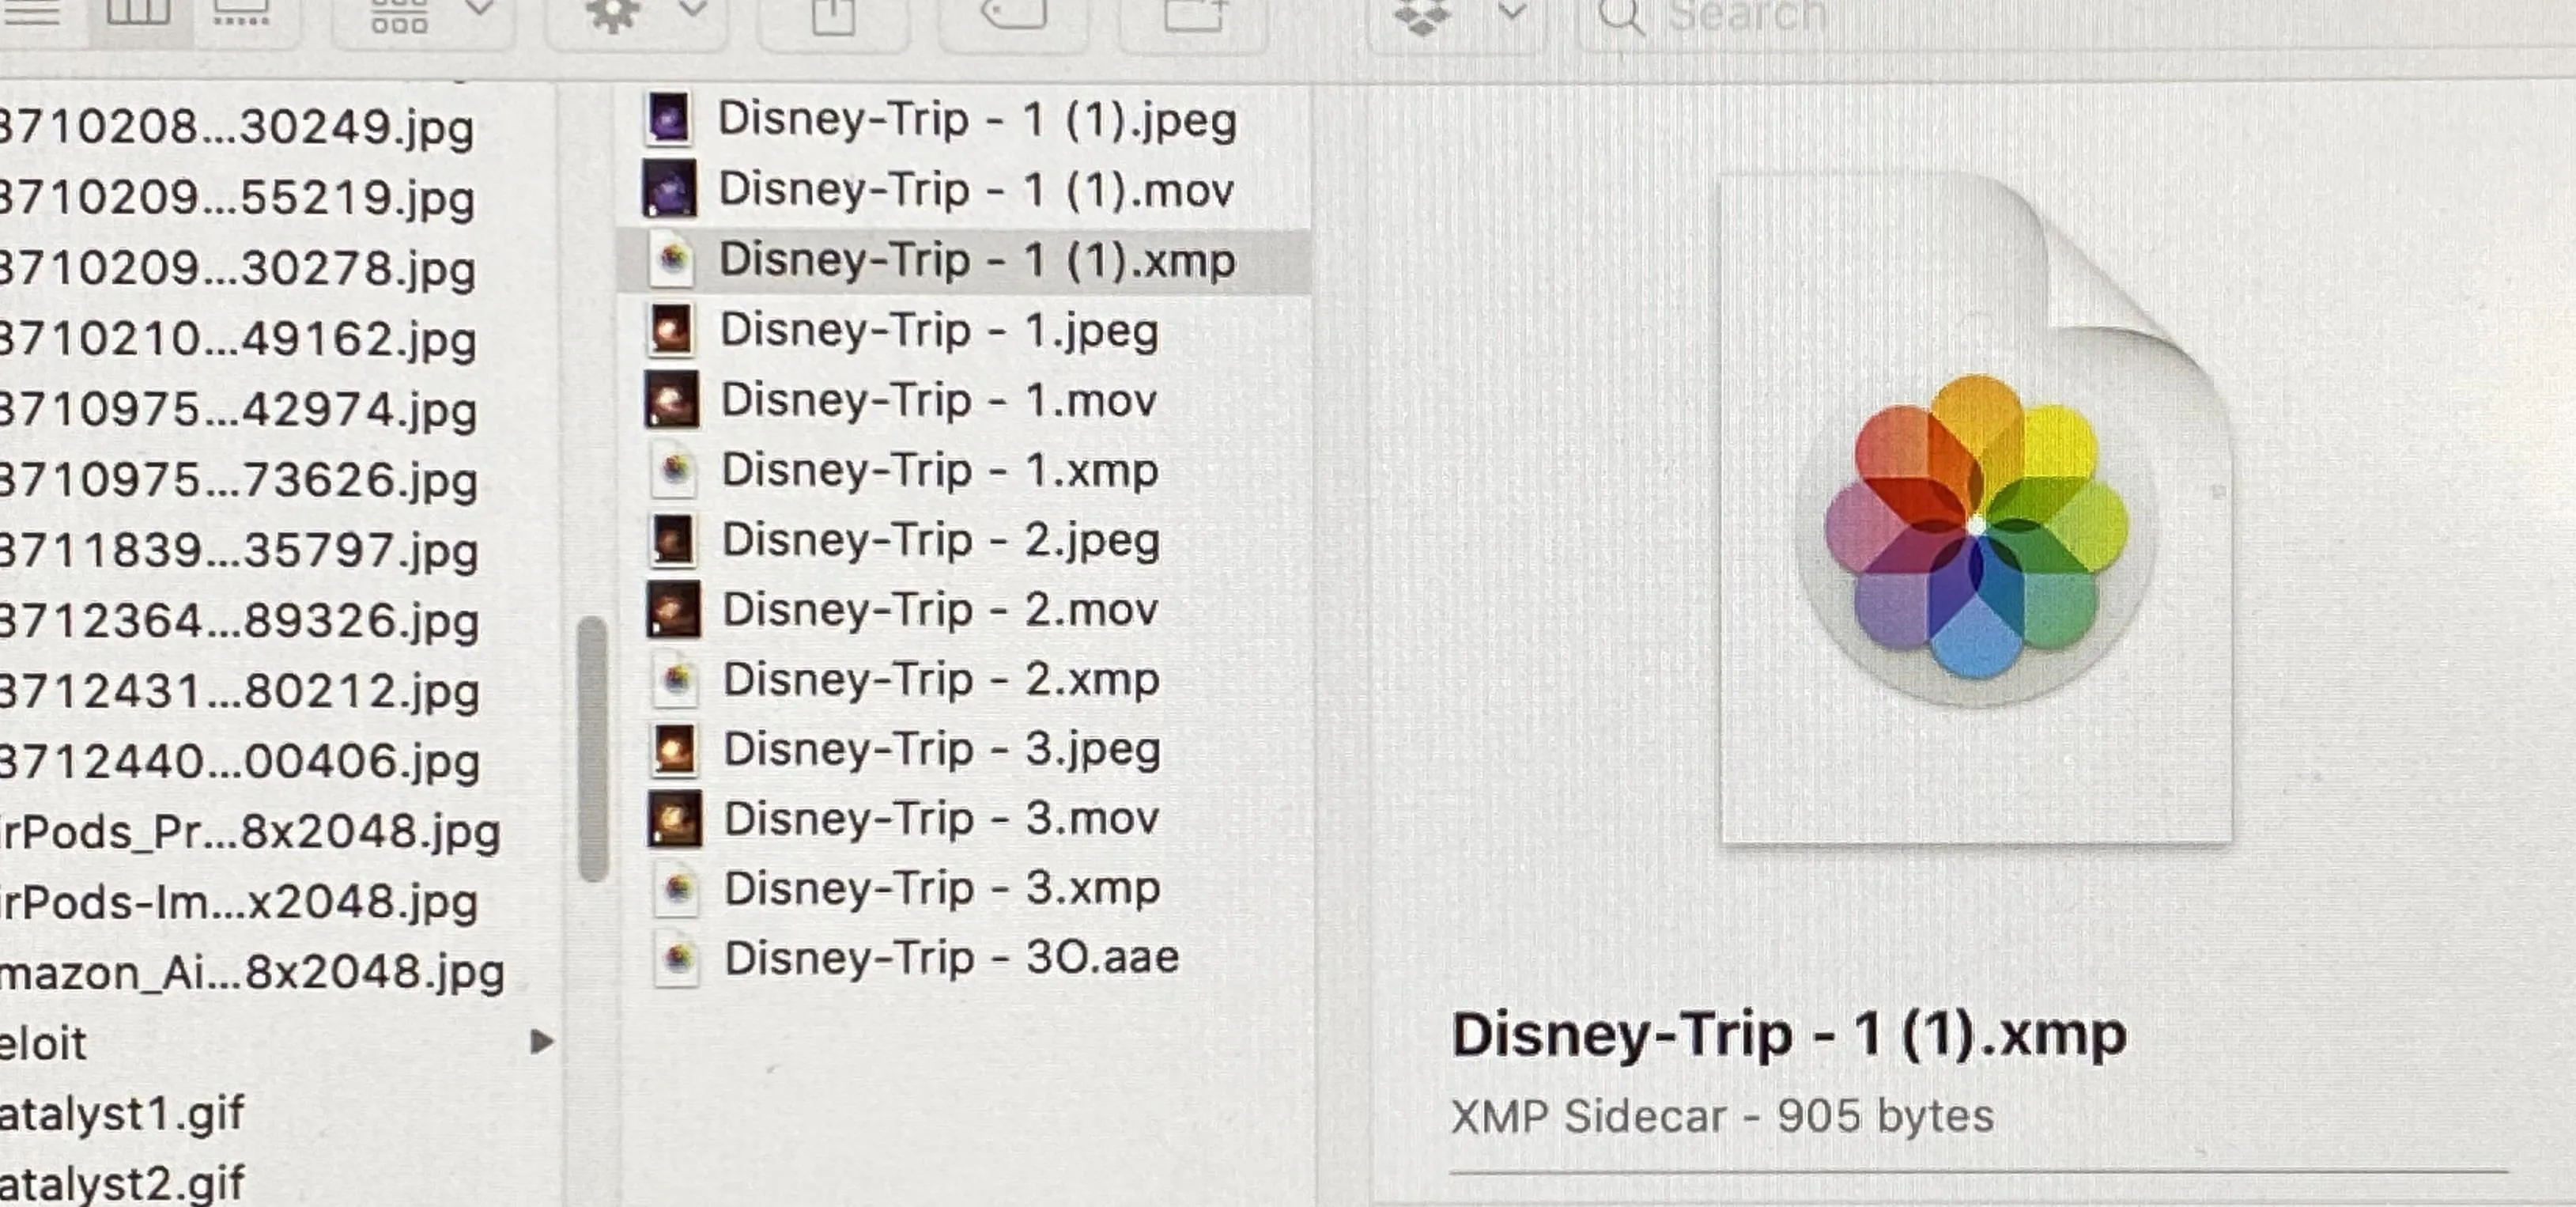
In the image export window, you'll have a couple of options to choose from. The "Export IPTC as XMP" checkbox, if checked, will export the image IPTC metadata and keywords as an .xmp sidecar file. The metadata can include location, camera model, title, description, keywords, copyright info, etc. This .xmp file can be read by many image-editing programs, such as Adobe Lightroom.
For the File Name drop-down, "Use File Name" is the default, which will export it with the same name that it was imported as. You can also choose "Use Title," if you assigned one in Photos, or "Sequential."
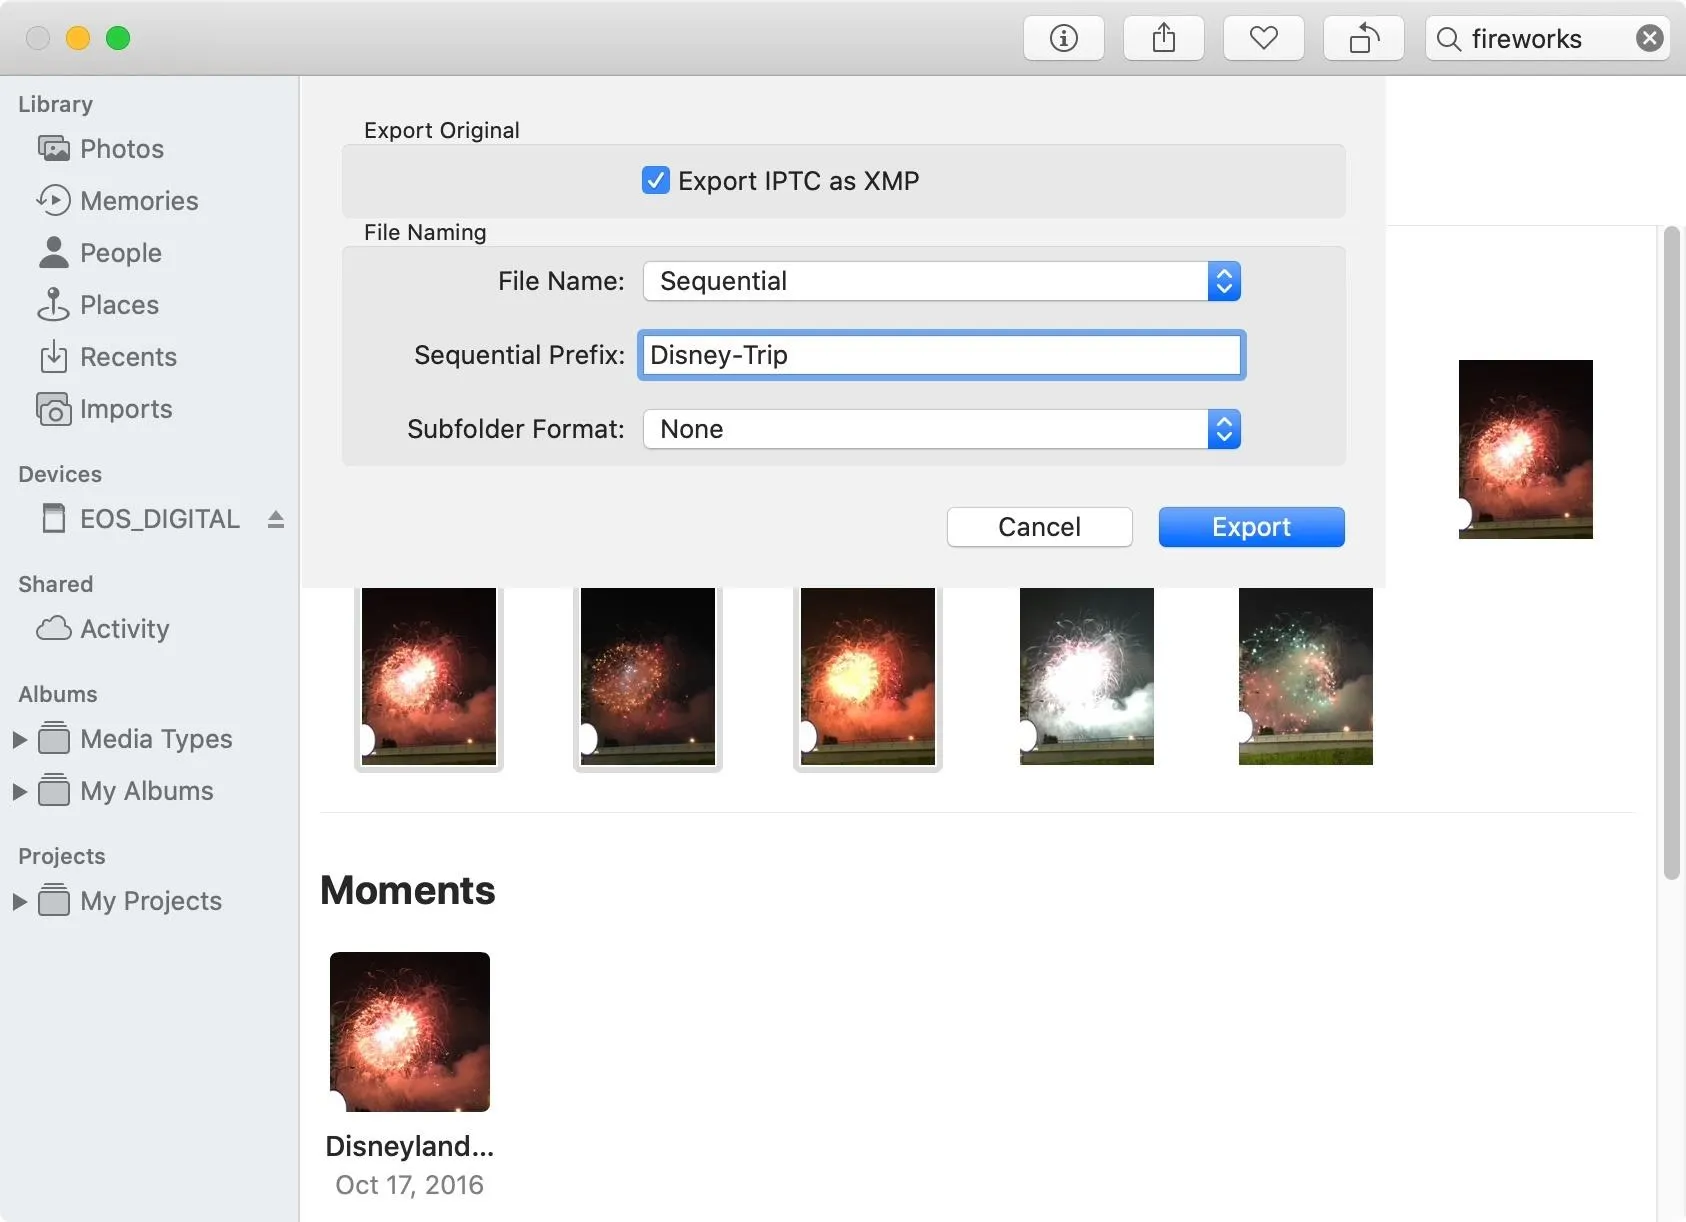
"Sequential" allows you to add a prefix such as "Disney-Trip." Whatever you type in will appear before each photo and video exported, and the file name will be changed to be sequential, so 1, 2, 3, and so on. If you want to make sure every image and video gets a unique number, you need to batch export them at the same time. If you go back and try to export more media with the same prefix, it'll start again at 1, 2, 3, etc.
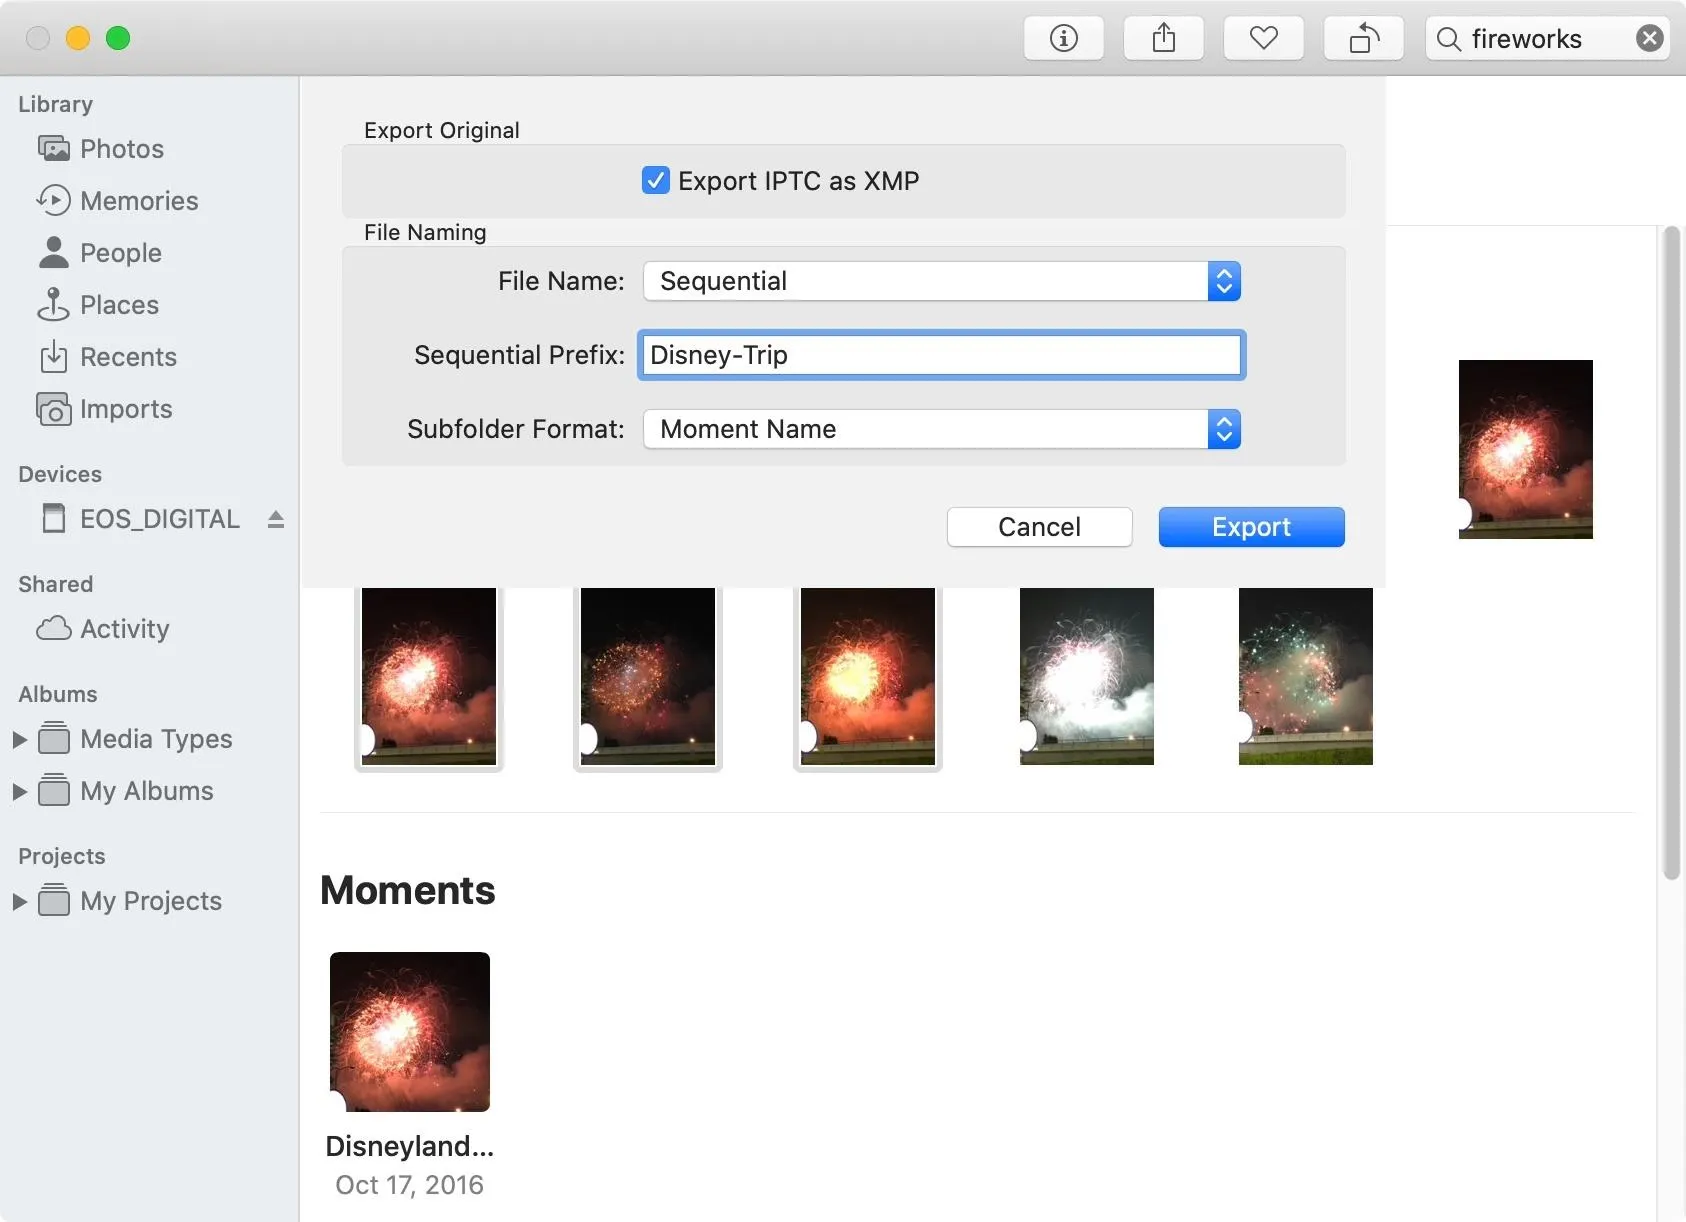
The optional Subfolder Format allows you to specify either "None," the default, which exports everything as individual files, or "Moment Name," which categorizes the pictures into folders based on the Moments specified inside Photos.
When you're all done, just hit that blue "Export" button. You'll be able to select the destination directory, and after you do so, hit "Export Original" or "Export Originals" to finish up. Anything you selected will be exported in its original format and uncompressed. If it's a Live Photo, it will export the image plus the .mov video file.
Also, the "Export" menu may also export any .aae files associated with images, which are XML files that house all of the non-destructive edits you've made to the media in Photos and other iOS apps. They can be read in apps like TextEdit, and they can be imported in Photos on other macOS and iOS devices with their associated files. It's okay to delete the .aae files if you want just the original media.

And as you can see, the Photos for Mac app makes saving your original images quite simple.
Cover image and screenshots by Isaac Sahag/Gadget Hacks












Comments
Be the first, drop a comment!