


If you regularly run into issues opening images that use the .heic extension, the easiest solution is to convert the file into a more compatible format. Using apps like Photos and Preview on a Mac makes the process simple, but macOS Monterey just streamlined the process so that you don't even have to open an app anymore.
Ever since iOS 11, Apple has supported the HEIF image format for pictures taken with the iPhone's Camera app. While these types of photos, which use the .heic and .heics extensions, have worked on Macs since macOS High Sierra, there are still app developers and non-Apple devices that have not fully embraced the High-Efficiency Image File Format. The new macOS 12 can help with that.
Why You Might Need to Convert HEIC to Other Formats
On an iPhone, there are two ways to capture photos from the camera — High Efficiency and Most Compatible — and you can set your preferred capture method in Settings –> Camera –> Formats. To put it simply, High Efficiency uses the .heic and .heics extension (HEIF format), depending on the number of images inside the file, while Most Compatible uses .jpg or .jpeg (JPEG format).
The HEIF format is excellent because it compresses photos into smaller file sizes than JPEG while preserving image quality. Some might even say that the image quality is better overall with HEIF. The problem is that not all software and platforms support .heic and .heics file types yet. So depending on what you plan to do with your photo (open in an app, upload to a website, etc.), you may have difficulties.
Big apps like Facebook, Twitter, and Flickr will automatically convert an HEIF file to JPEG, but not all services will do that. For example, HEIF images are not compatible with the Media Library of WordPress.com websites. Some stock photo sites may not support HEIF yet either, such as Unsplash, which requires JPEG formats (.jpg, .jpeg).
Those are just a few examples of why taking HEIF images on your iPhone could cause problems. Apple made it an option in the Camera app's settings since HEIF support was few and far between when iOS 11 first hit, but it's still an option, which means it's still not universally supported. Before macOS Monterey, the main ways to avoid HEIF were:
- Choose "Most Compatible" in the Camera app's settings on your iPhone. This will default to JPEG format when shooting photos.
- Choose "Automatic" in the Photos app's settings on your iPhone. This will convert most HEIF files into JPEGs whenever you transfer them to a Mac or PC.
- Open the HEIF file in Photos or Preview on your Mac, then choose File –> Export –> [your intended file type].
- Use a third-party desktop, mobile, or web app to convert HEIF to other formats.
Converting HEIC in MacOS Monterey Is Easy
With macOS Monterey (version 12), there is an easier option. If you have an .heic or .heics file on your Mac, right-click or control-click the file to reveal the contextual menu. Image conversion also works with multiple files simultaneously, so if you need to convert two or more images, save time by selecting them all before opening the contextual menu.
Near the bottom of the menu, hover over "Quick Actions," then find the new "Convert Image" option.
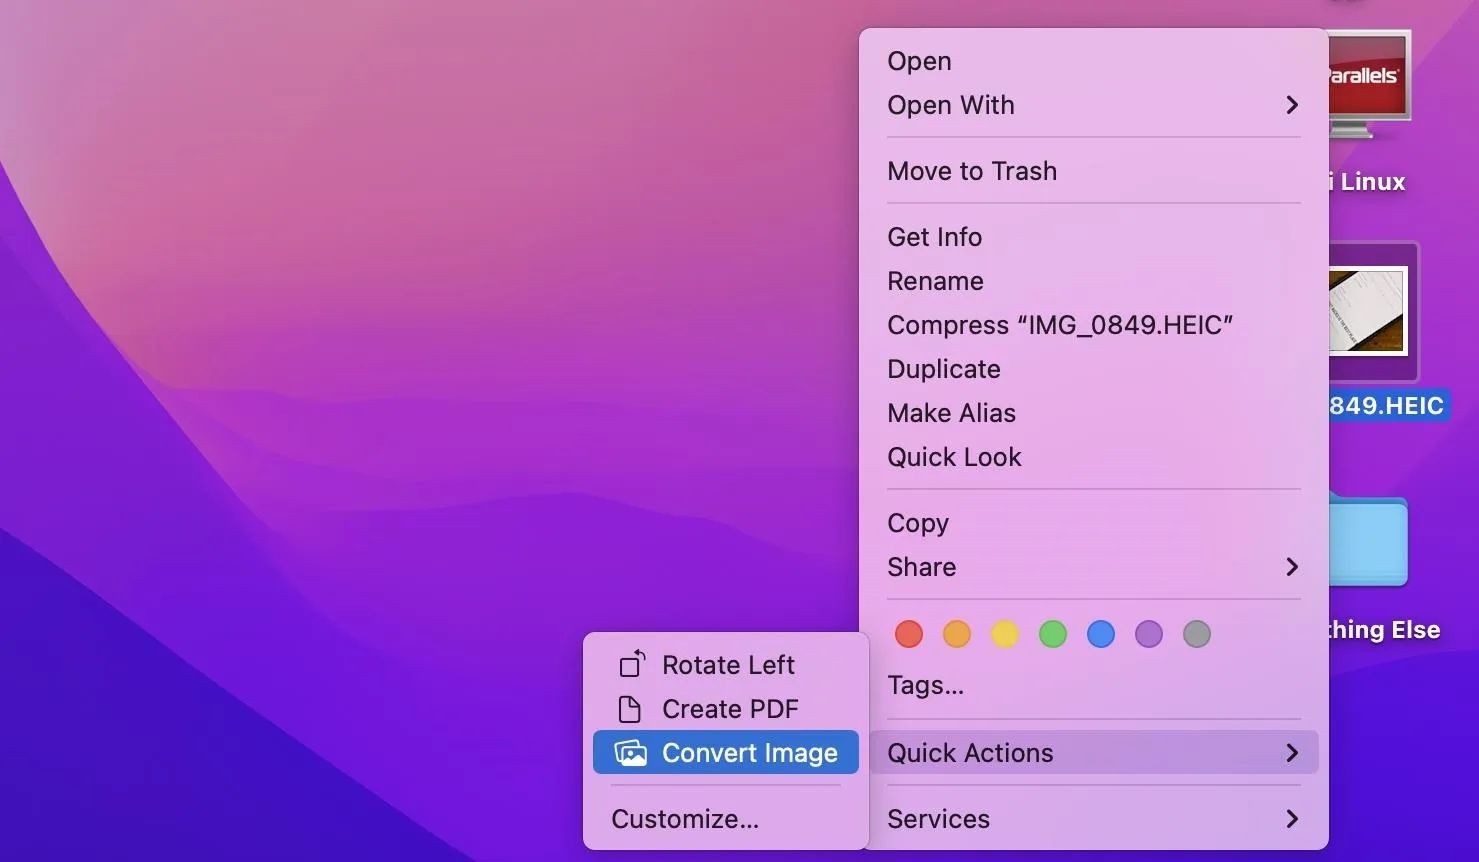
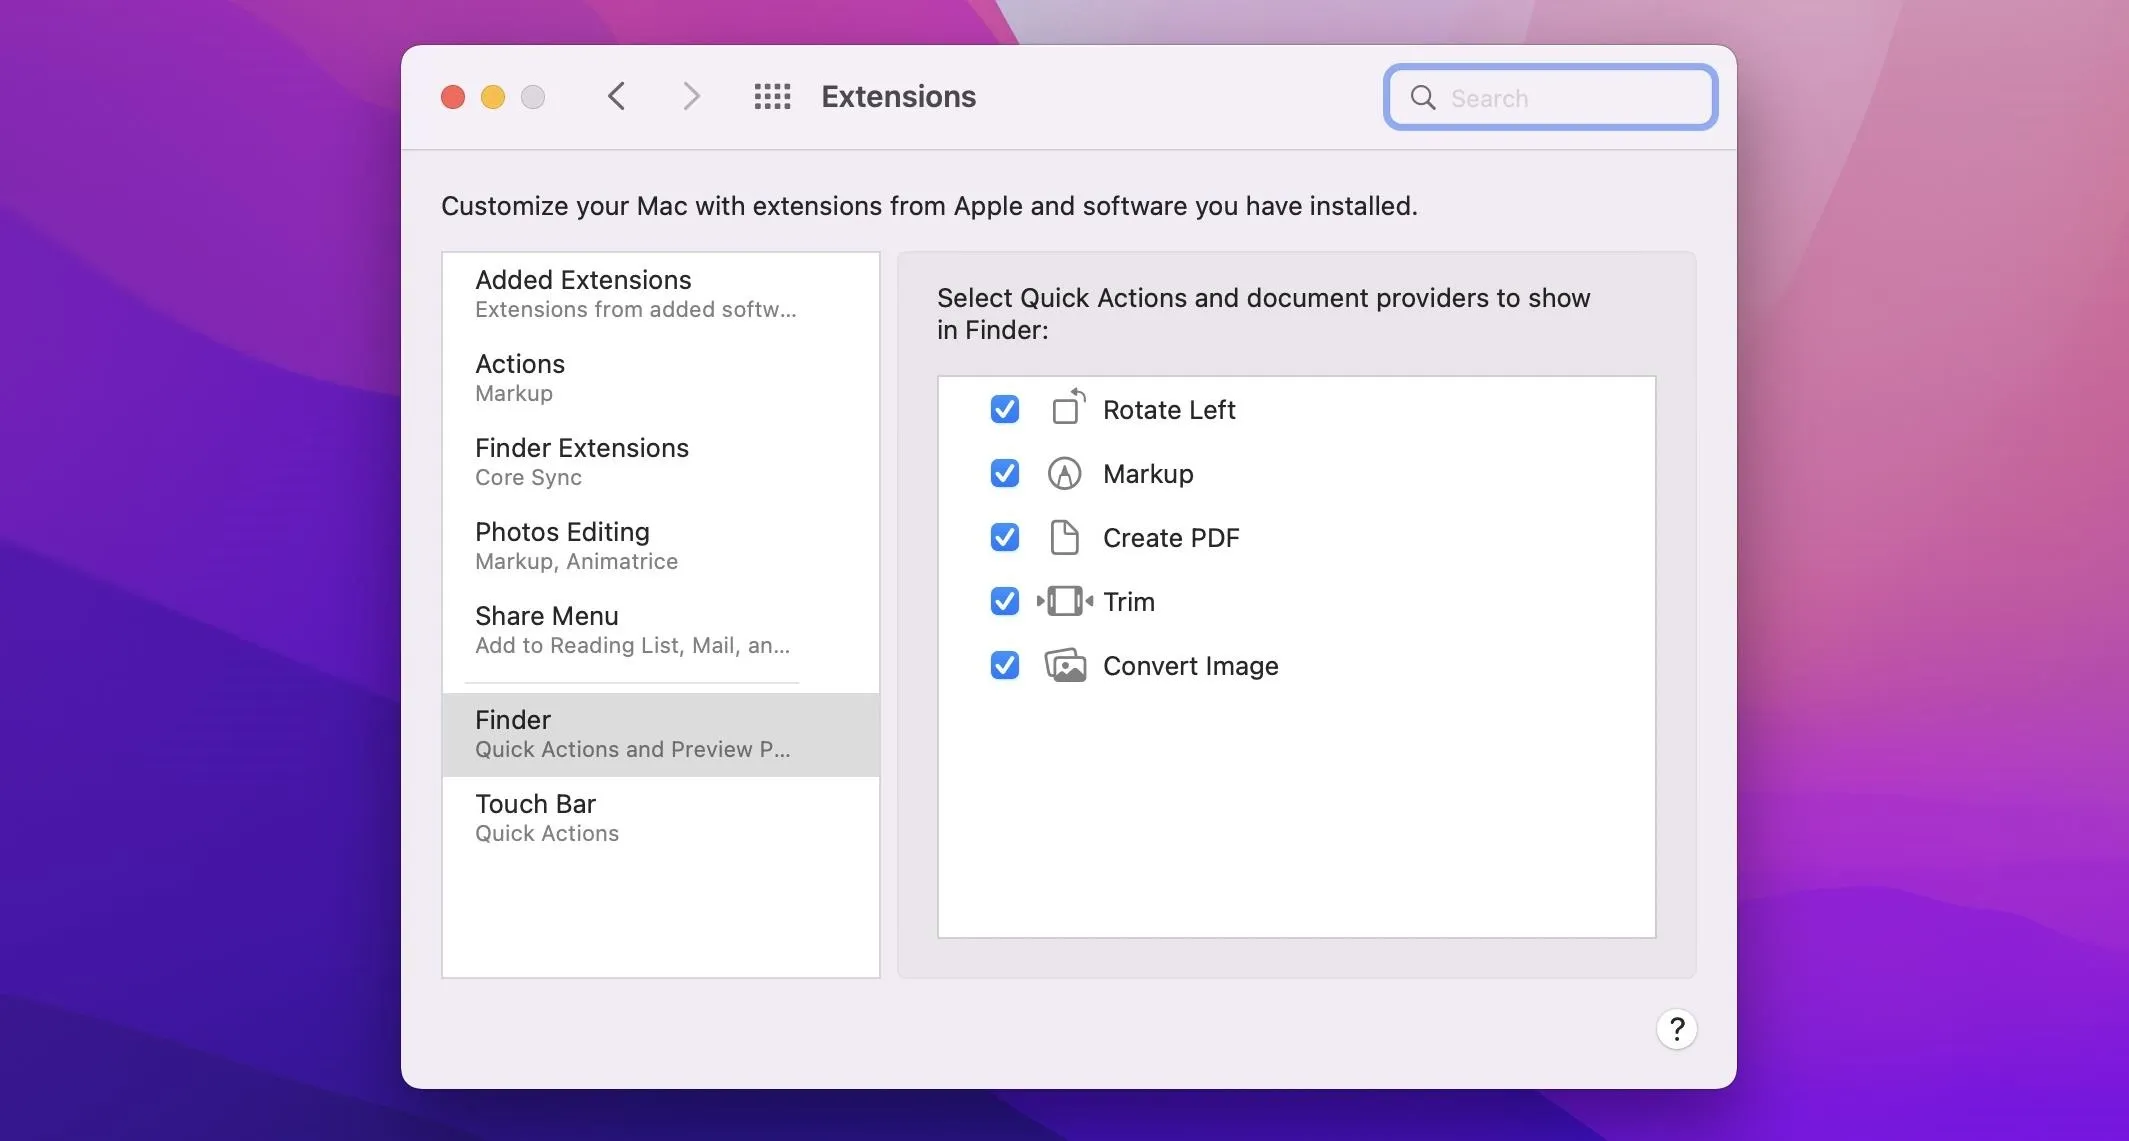
If you don't see it, select "Customize" and make sure "Convert Image" is checked in the Finder extensions list.
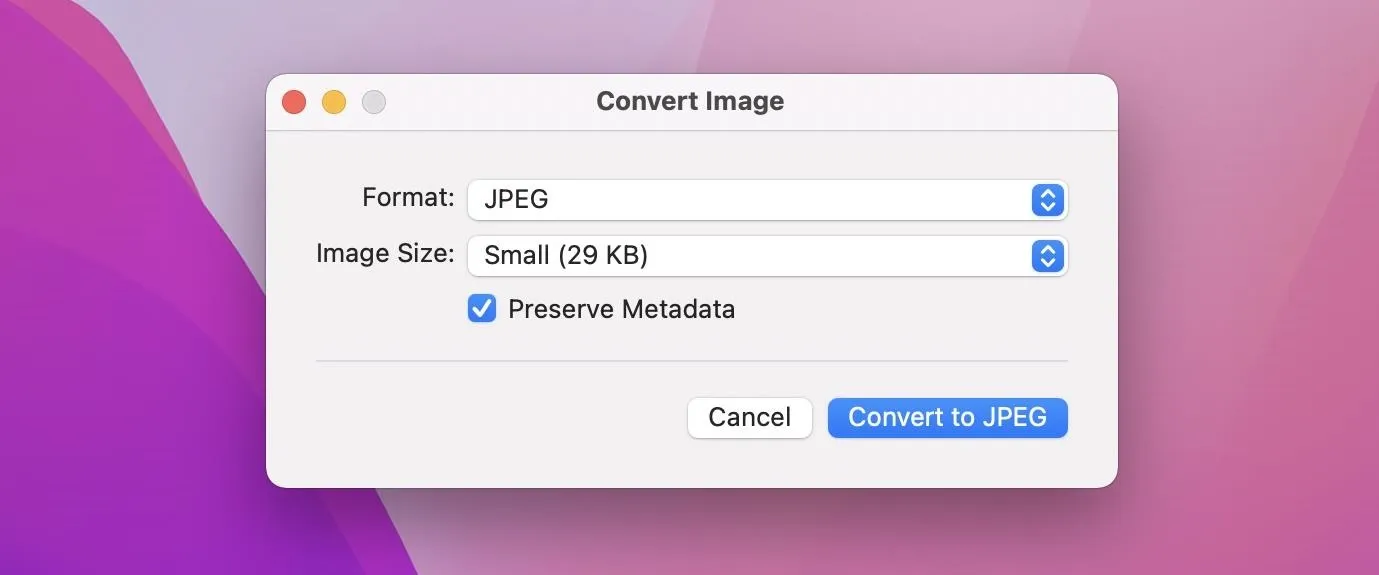
Selecting "Convert Image" will bring you to a dialog box with a few options. For an HEIF image, you can convert it to either JPEG or PNG (.png) formats. You can also choose the image size to be small, medium, large, or original. For PNG, the file sizes will usually be larger than JPEGs.
There is also a checkbox to "Preserve Metadata," which will keep image data such as location, camera details, tags, and date/time.
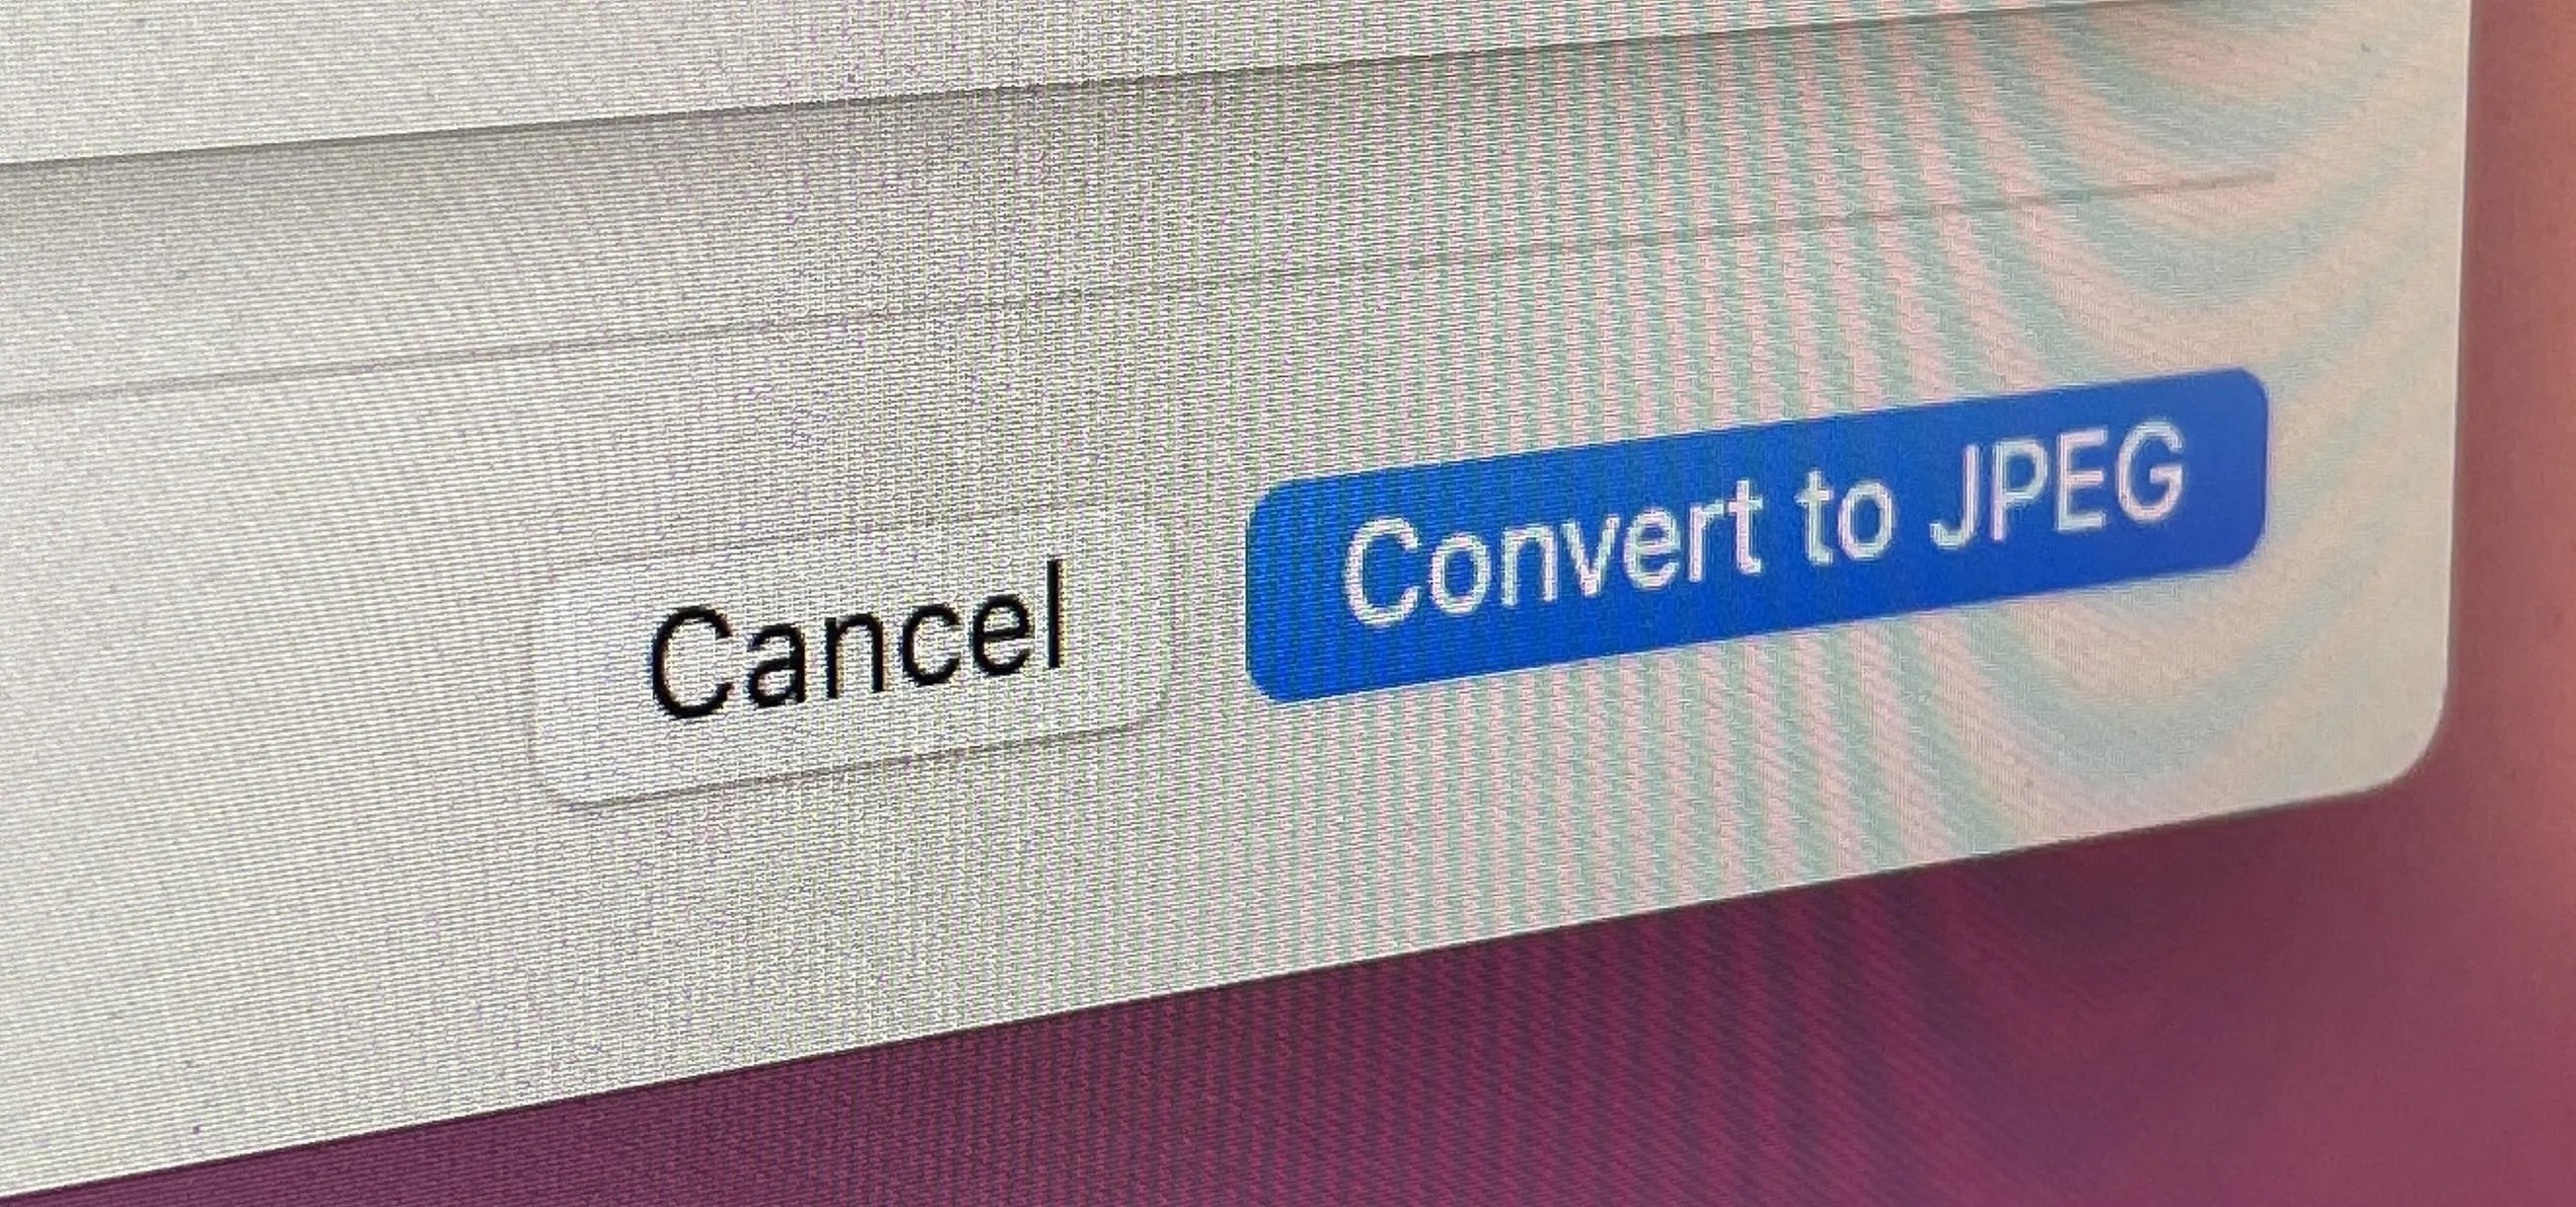
When ready, hit "Convert to JPEG" or "Convert to PNG." The converted copy (or copies) will appear in the same directory the HEIF image or images were located.
Each converted file's name will remain unchanged aside from the file extension. If you perform a single conversation from within Finder (instead of Desktop), it gives you a chance to rename the file right away. If you do more than one, it will highlight all the files instead.
The "Convert Image" quick action can also convert other files types to JPEG, PNG, or HEIF, such as JPEG, PNG, TIFF, GIF, Bitmap, and even Google's WebP files, but it won't let you convert PDFs.
Aside from working with multiple file types and batch conversion, you can convert various file types simultaneously too. That means you can convert a group of images in different formats to a single format type.
"Convert Image" is an excellent addition to macOS, which will make it easier to work with and share HEIF images until the format becomes more ubiquitous.
Cover photo and screenshots by Justin Meyers/Gadget Hacks


Comments
Be the first, drop a comment!