


Automator takes the work out of common repetitive tasks in Mac OS X. One of my least favorites is resizing images for the web, so I created a drag and drop action to quickly do it for me.
Download the Automator App
This part is pretty easy. Just click here to download it.
Resize Images Automatically
In the spirit of automation, you don't have to know much to use this. Just unzip the app after downloading and drag a bunch of image files onto it.
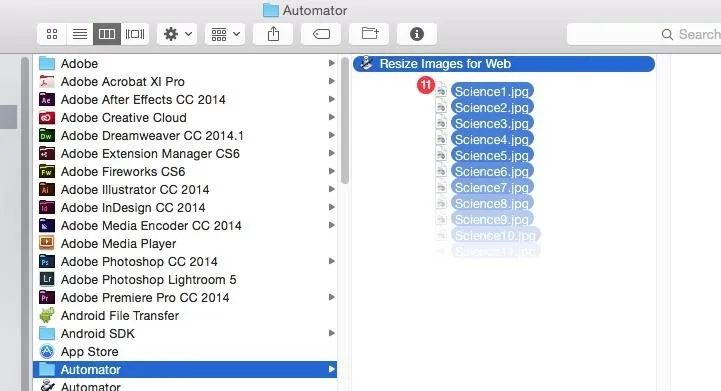
Wherever those images reside on your hard drive, a new folder called "resized" will be created with smaller copies (with a maximum width and/or height of 2,000 pixels).
If you have a lot of images, it might take a minute or two to run, but generally speaking the conversion will finish in a matter of seconds and you can enjoy your smaller images.
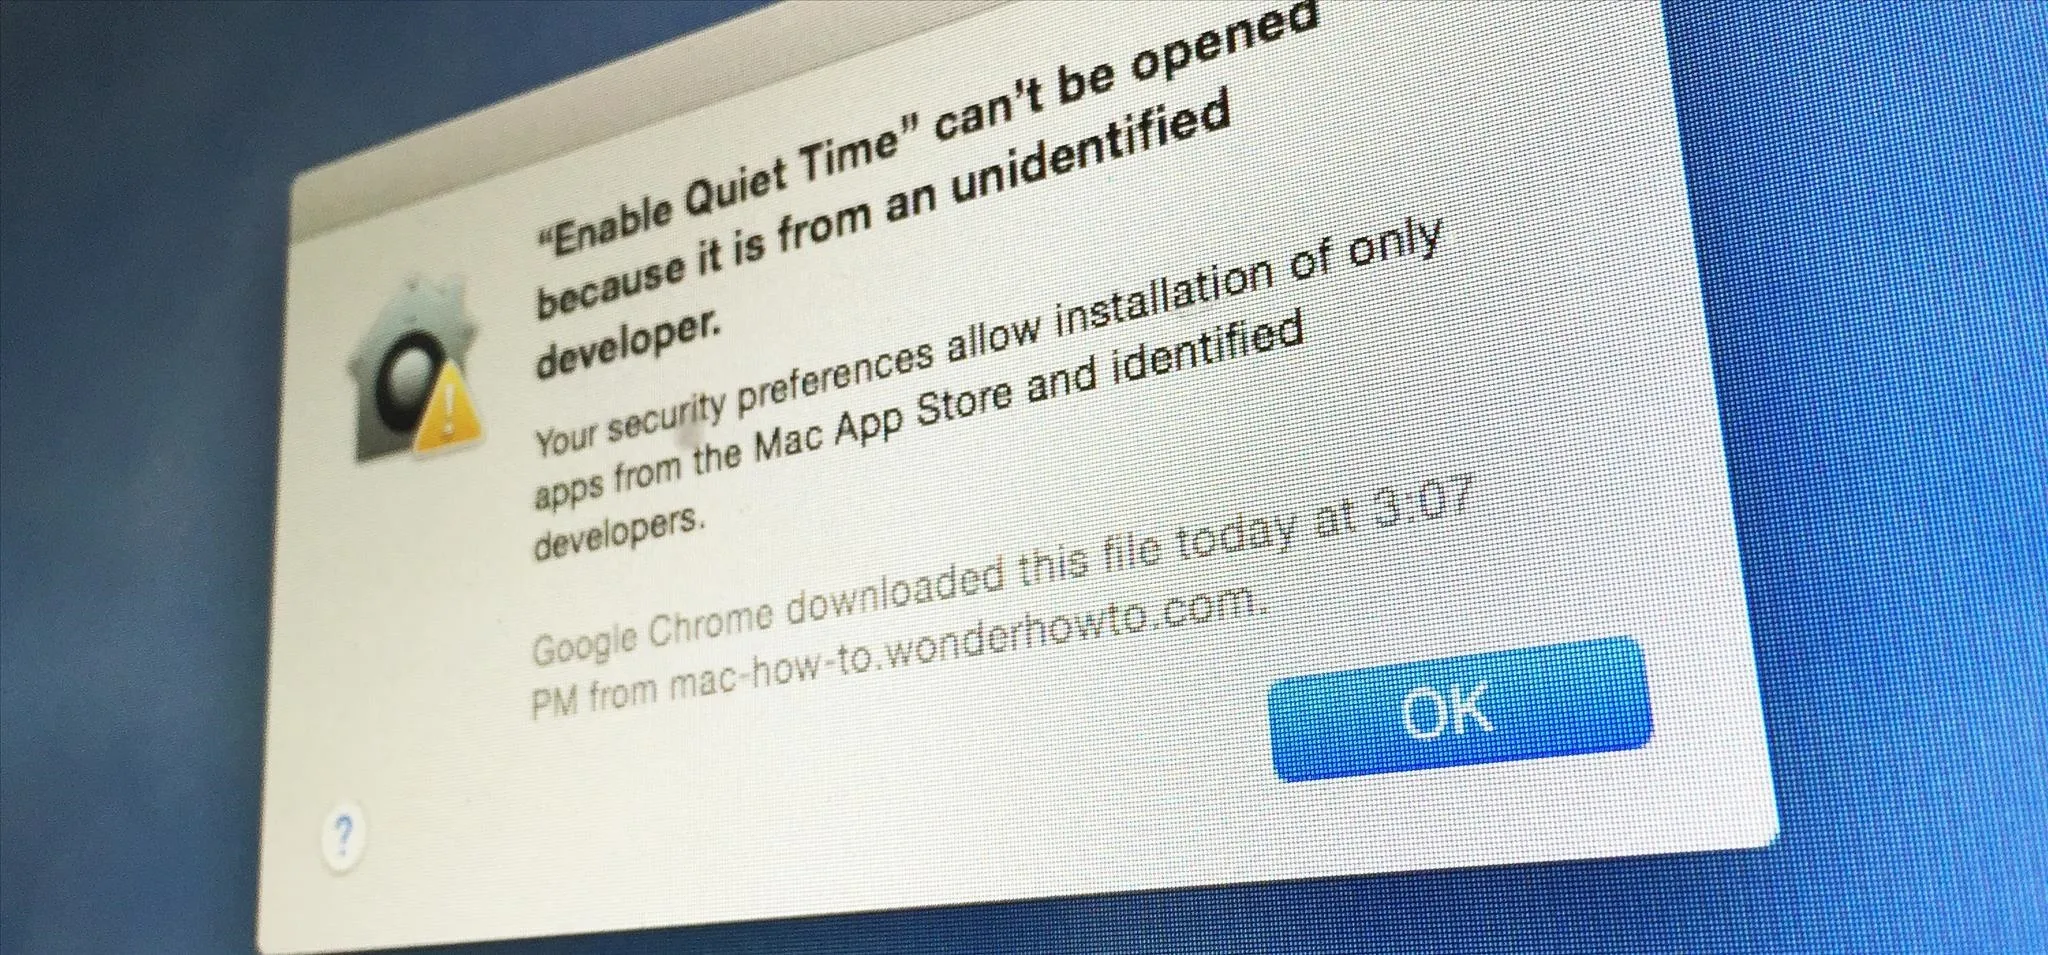
App Won't Open? Okay It in the Security Settings
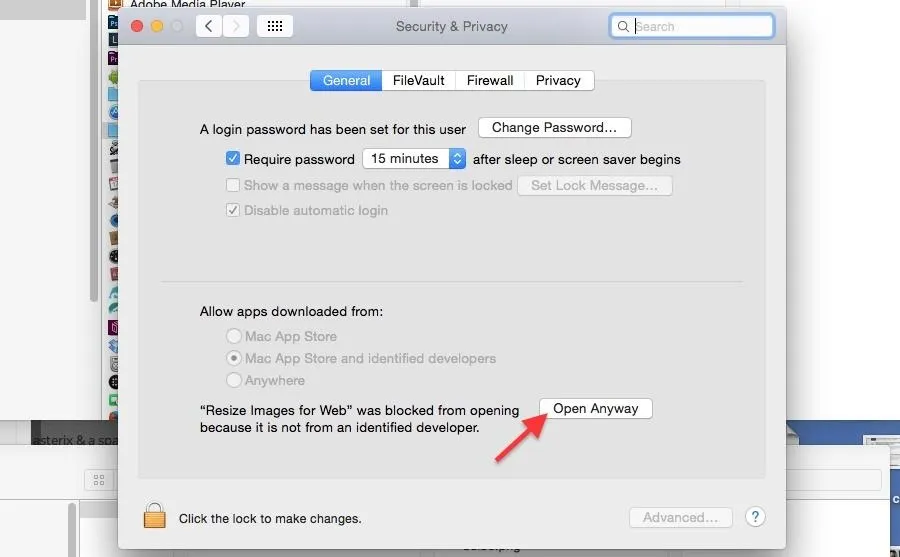
If you see the warning that says you can't open the app because it's from an unidentified developer, as seen below, then just open up System Preferences and head to the Security & Privacy section.

In the General tab, you should see the blocked app; just hit "Open Anyway" to okay it, then try dragging and dropping images into the app again. You can also switch your preferences in this menu to download apps from "Anywhere" if you want, but it's safer on a case-by-case basis.
For more information this, check out our quick Gatekeeper guide.
Customize (Optional)
If a maximum width and height of 2,000 pixels doesn't suit your needs, you can edit this Automator app and change that (or anything else about it). First, locate Automator in your Applications folder and drag this app onto it.
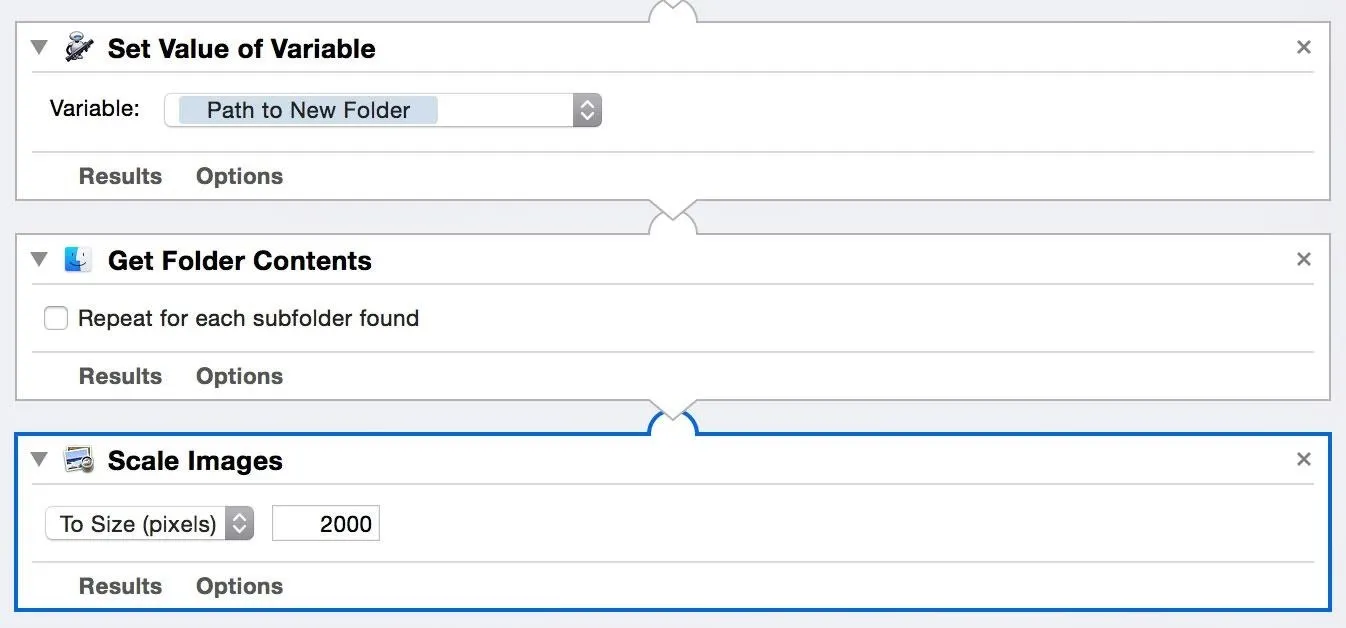
Next, scroll all the way down to the last item in the automation process to find "Scale Images" (pictured above). You'll only see one option here, and it's a number specified next to the "To Size (pixels)" drop-down menu. It is currently set at 2,000, but if you want smaller or larger images, you can change this number to what suits you best.
I chose 2,000 because it provides decent resolution at a small file size, which is useful for Facebook, Craigslist, Twitter, and several other sites where you might need to upload images. If you have different needs, just change it here, save, and close out the app. It'll now work the way you want.
If you have multiple resizing needs, make copies of the app and edit it to specify different maximum sizes for each app. (Putting the resolution size for each one in the app's name will make it easier to tell which is which.) That way you can just drag images onto the one you need and they'll resize accordingly.


Comments
Be the first, drop a comment!