


If you've been testing out the Mac OS X Yosemite preview, you already know that Mac OS X 10.10 has a ton of cool under-the-hood tweaks and optimizations. One of the most noticeable changes for me has to be the new flatter look and "Dark Mode," which changes most UI elements from silver to black, making it easier to use your Mac in low-light conditions.
While the official release of Mac OS X Yosemite is still a month or two away, you can already get some of the new UI changes right now on Mavericks. We've already shown you how to get the new Yosemite app icons in your Mavericks dock, now we'll hit up the menu bar.
Developer Max Rudberg has came out with his own take on "Dark Mode," releasing a completely black version of the Mac OS X menu bar, called Obsidian Menu Bar.
Download & Install Obsidian Menu Bar
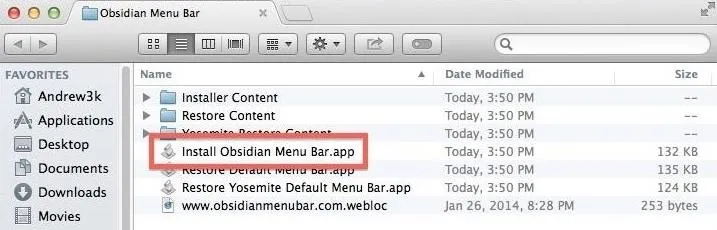
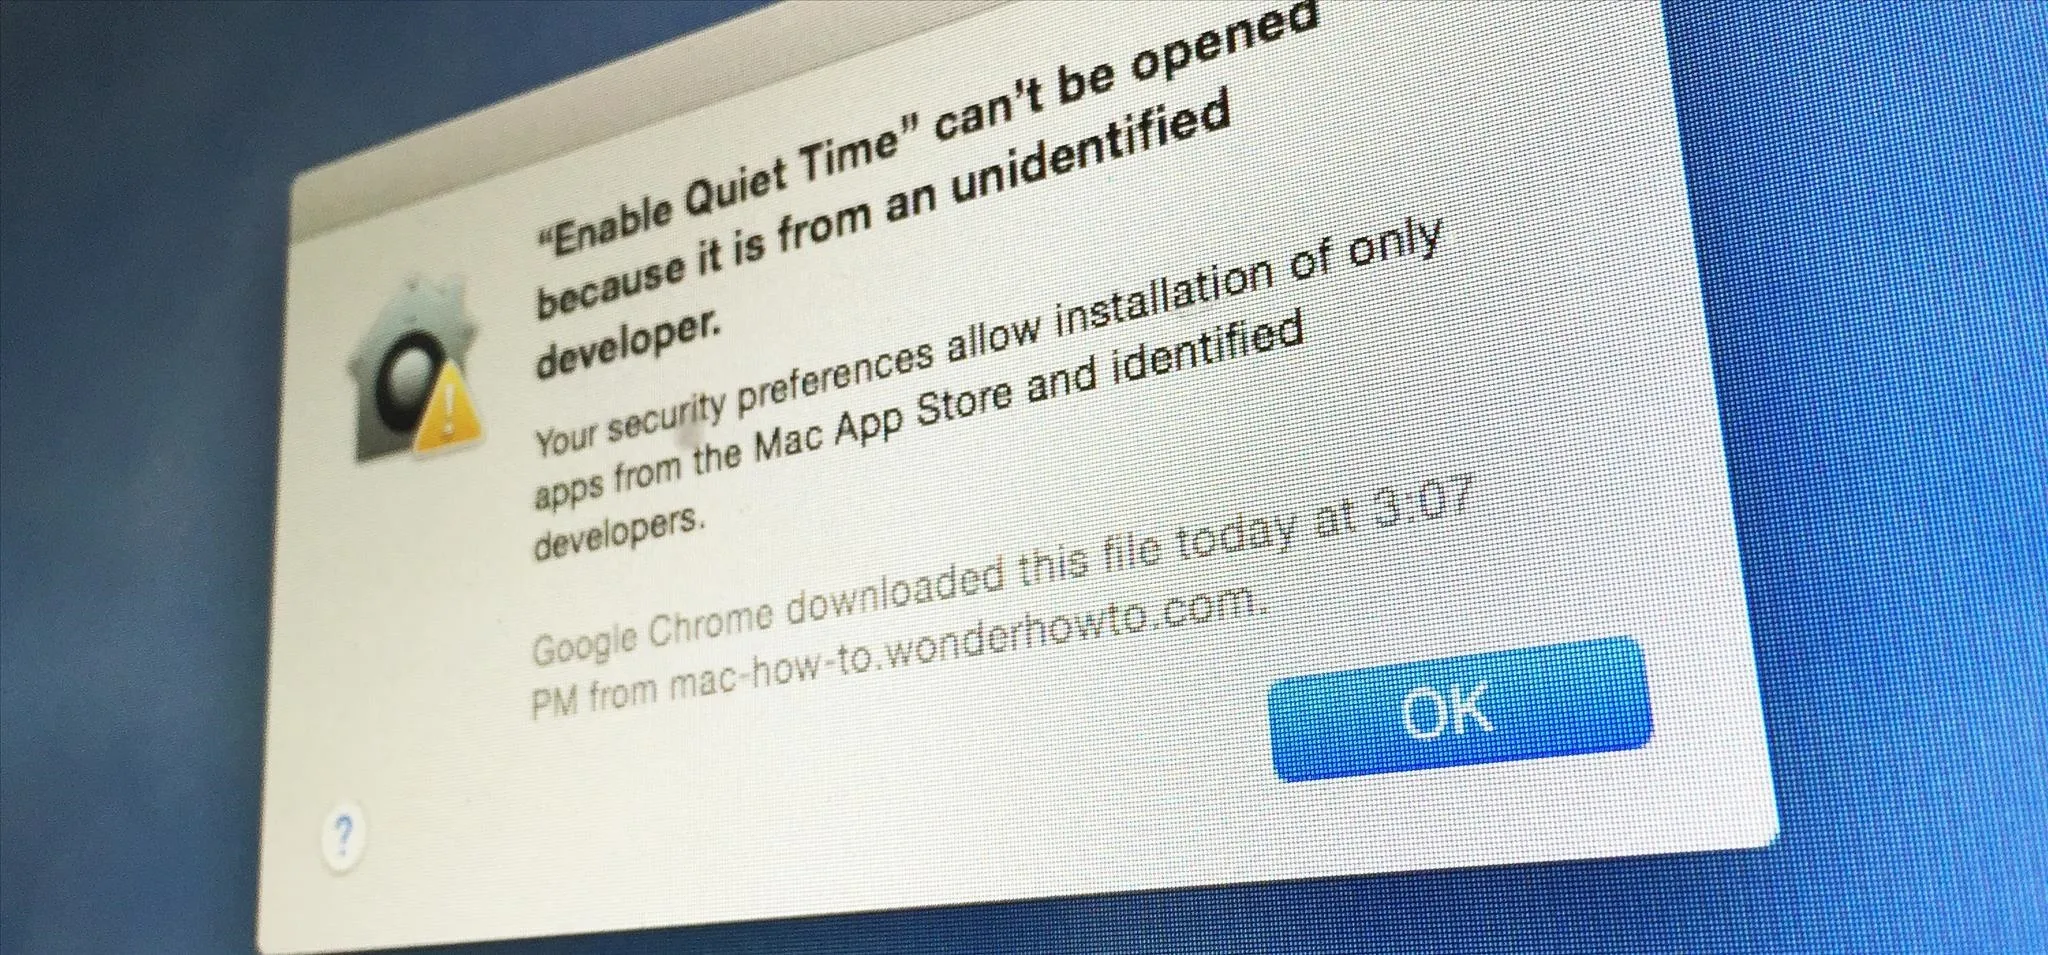
After you've downloaded Obsidian Menu Bar, extract it, then double-click the script labeled Install Obsidian Menu Bar (you'll need to enter your admin password).
Keep in mind that this cannot be toggled on and off as easily as Dark Mode in Yosemite, so a full uninstall will be required to go back to stock.
Move the "WhiteUIServer.Menu" File
Once the install has finished, move WhiteUIServer.menu anywhere, but be sure it's a location where it will not be deleted. I keep mine in the main Documents folder.
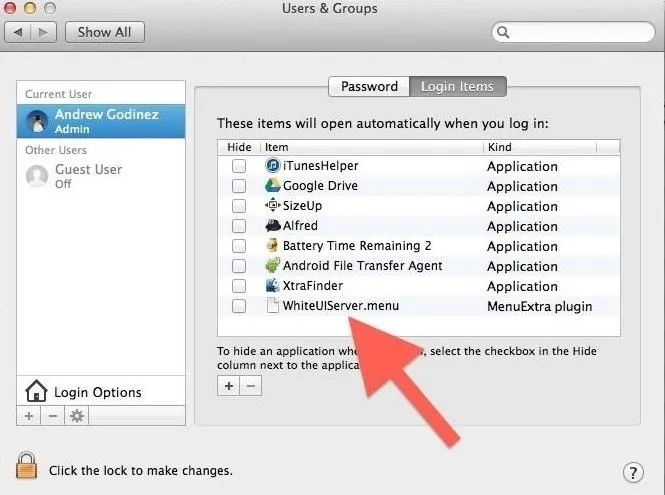
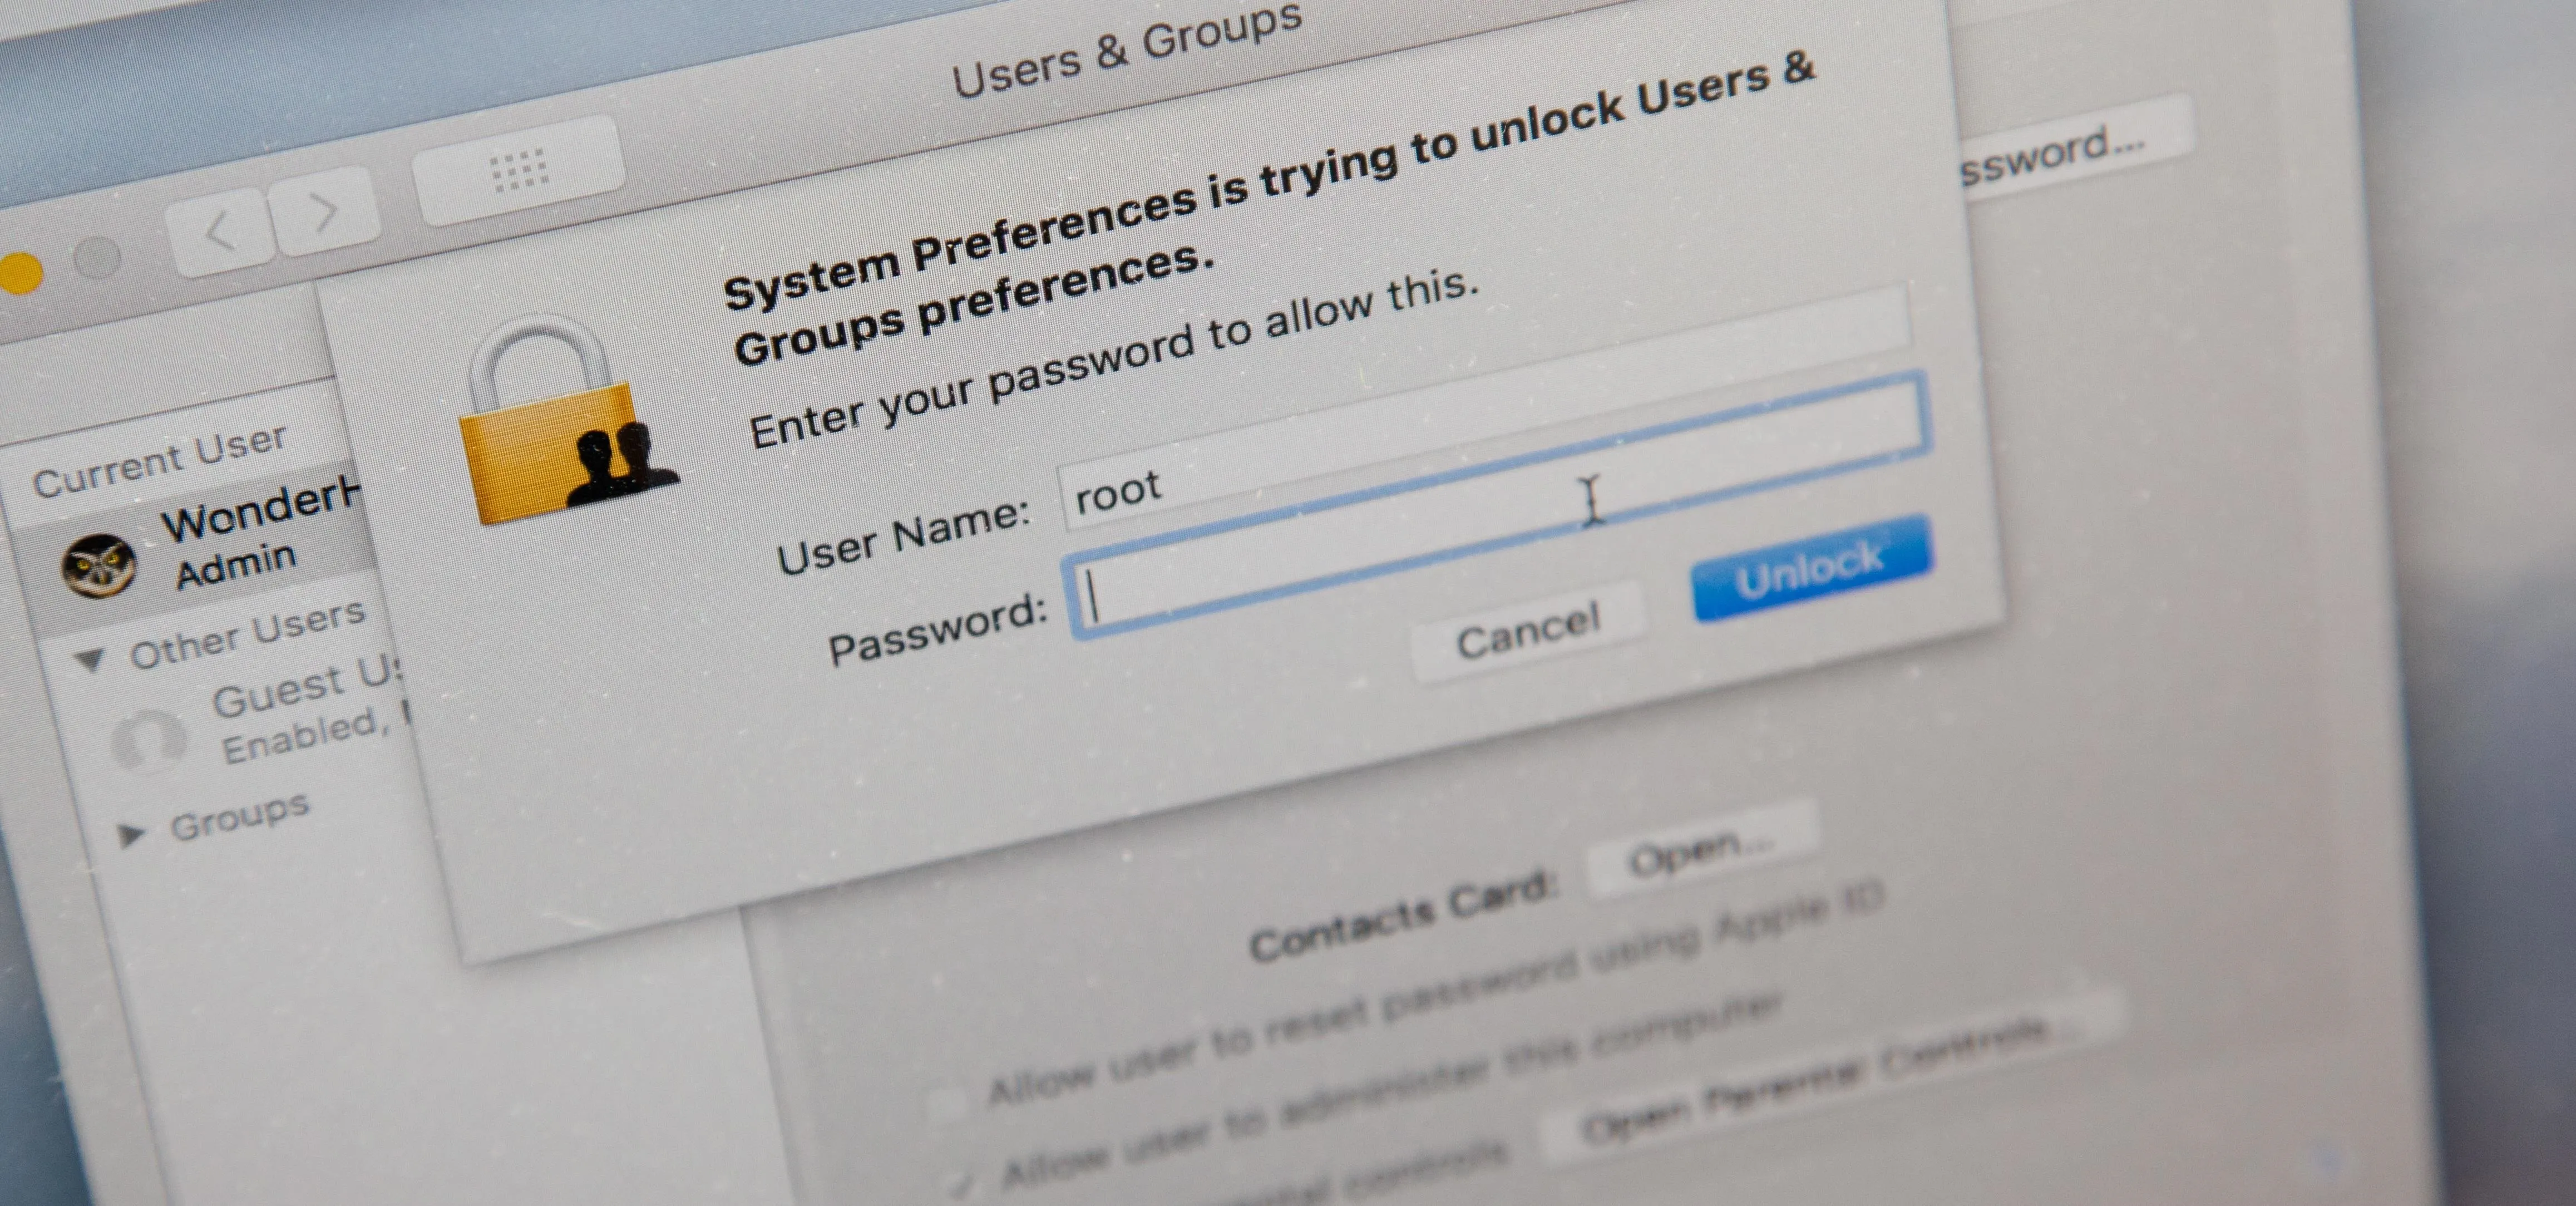
You will also need to add WhiteUIServer.menu to your login items. To do that go to System Preferences -> Users & Groups -> Login Items, tap the + icon, and add WhiteUIServer.menu.
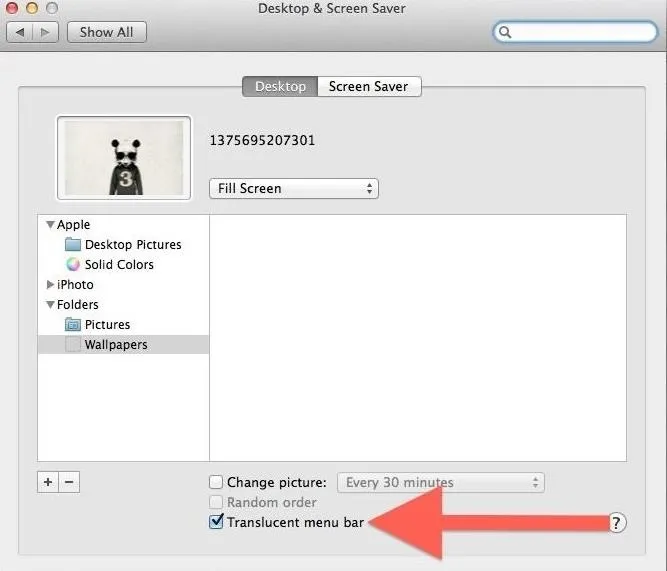
Turn Off Translucent Menu Bar
To finish up the installation, go to System Preferences -> Desktop & Screen Saver -> Desktop and uncheck Translucent menu bar.
Now all you will have to do is log out and back in to see the changes take effect.
Optional Steps
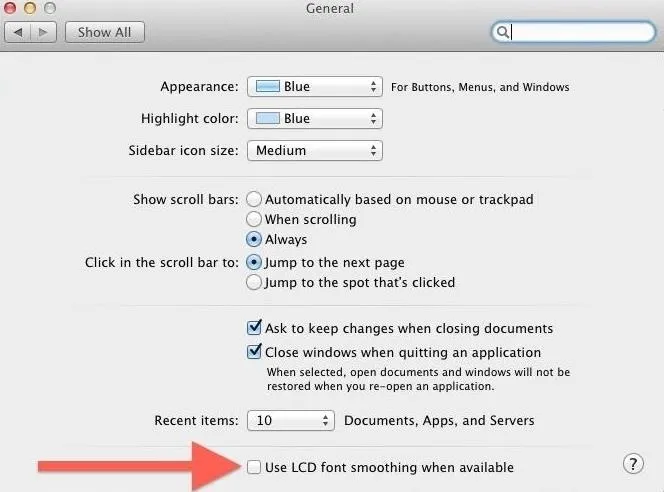
The developer also suggested a few extra steps to make Obsidian Menu Bar look even better. First, you should uncheck LCD Font Smoothing from System Preferences -> General. This will reduce the width of the menu bar font to help it blend in better with the background.
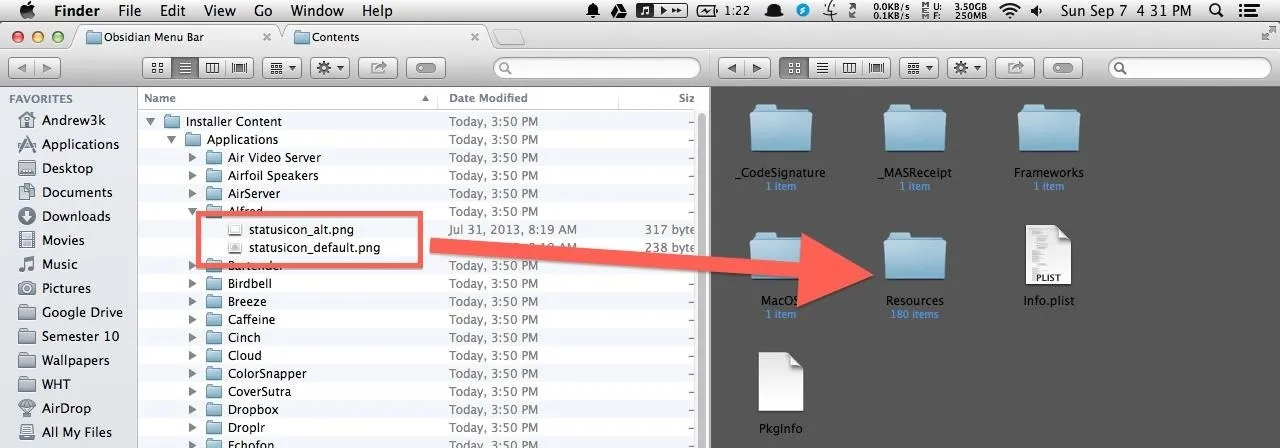
He also included some third-party menu bar icons in Installer Content -> Applications. To install the icons, right-click any app in your Applications folder and click Show Package Contents.
Move the icons from Installer Content\Applications\App Name to Contents -> Resources. You will need to click Replace, then enter your password for the files to successfully be copied.
After the icons have been replaced, just log out and in again. You should now have a fully functional Dark Mode menu bar on your Mac running Mac OS X Mavericks 10.9 to 10.9.4.
Return to Stock
Unlike Yosemite, this mod does not come with a deactivate toggle, so to go back to stock, you will need to run the Restore Default Menu Bar script. After the script finishes, you will also need to remove WhiteUIServer.menu from your login items.
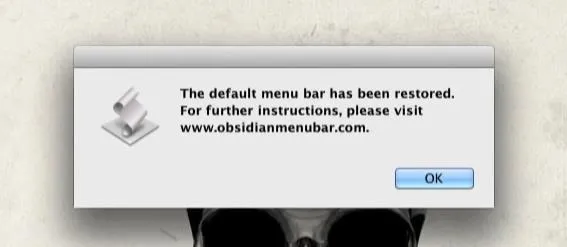
Now all that is left is to restart your computer and you will be completely back to normal. If you run into any problems getting the menu bar to apply correctly, be sure to drop me a comment, or hit us up on Facebook and Twitter.


Comments
Be the first, drop a comment!