


Automator takes the work out of common repetitive tasks. I don't enjoy compressing videos for quick sharing or uploading to the web, so I created an Automator action to handle the process for me.
Download the Automator App
This part is pretty easy. Just click here to download it.
Learn How It Works
In the spirit of automation, you don't have to know much to use this app. Simply find a video file (in any format supported by QuickTime), drag it onto the app, and wait. A new file will be encoded in the same location as the original in standard definition (e.g. 640x480 or 640x360). It will be compatible with most video services and Apple products.
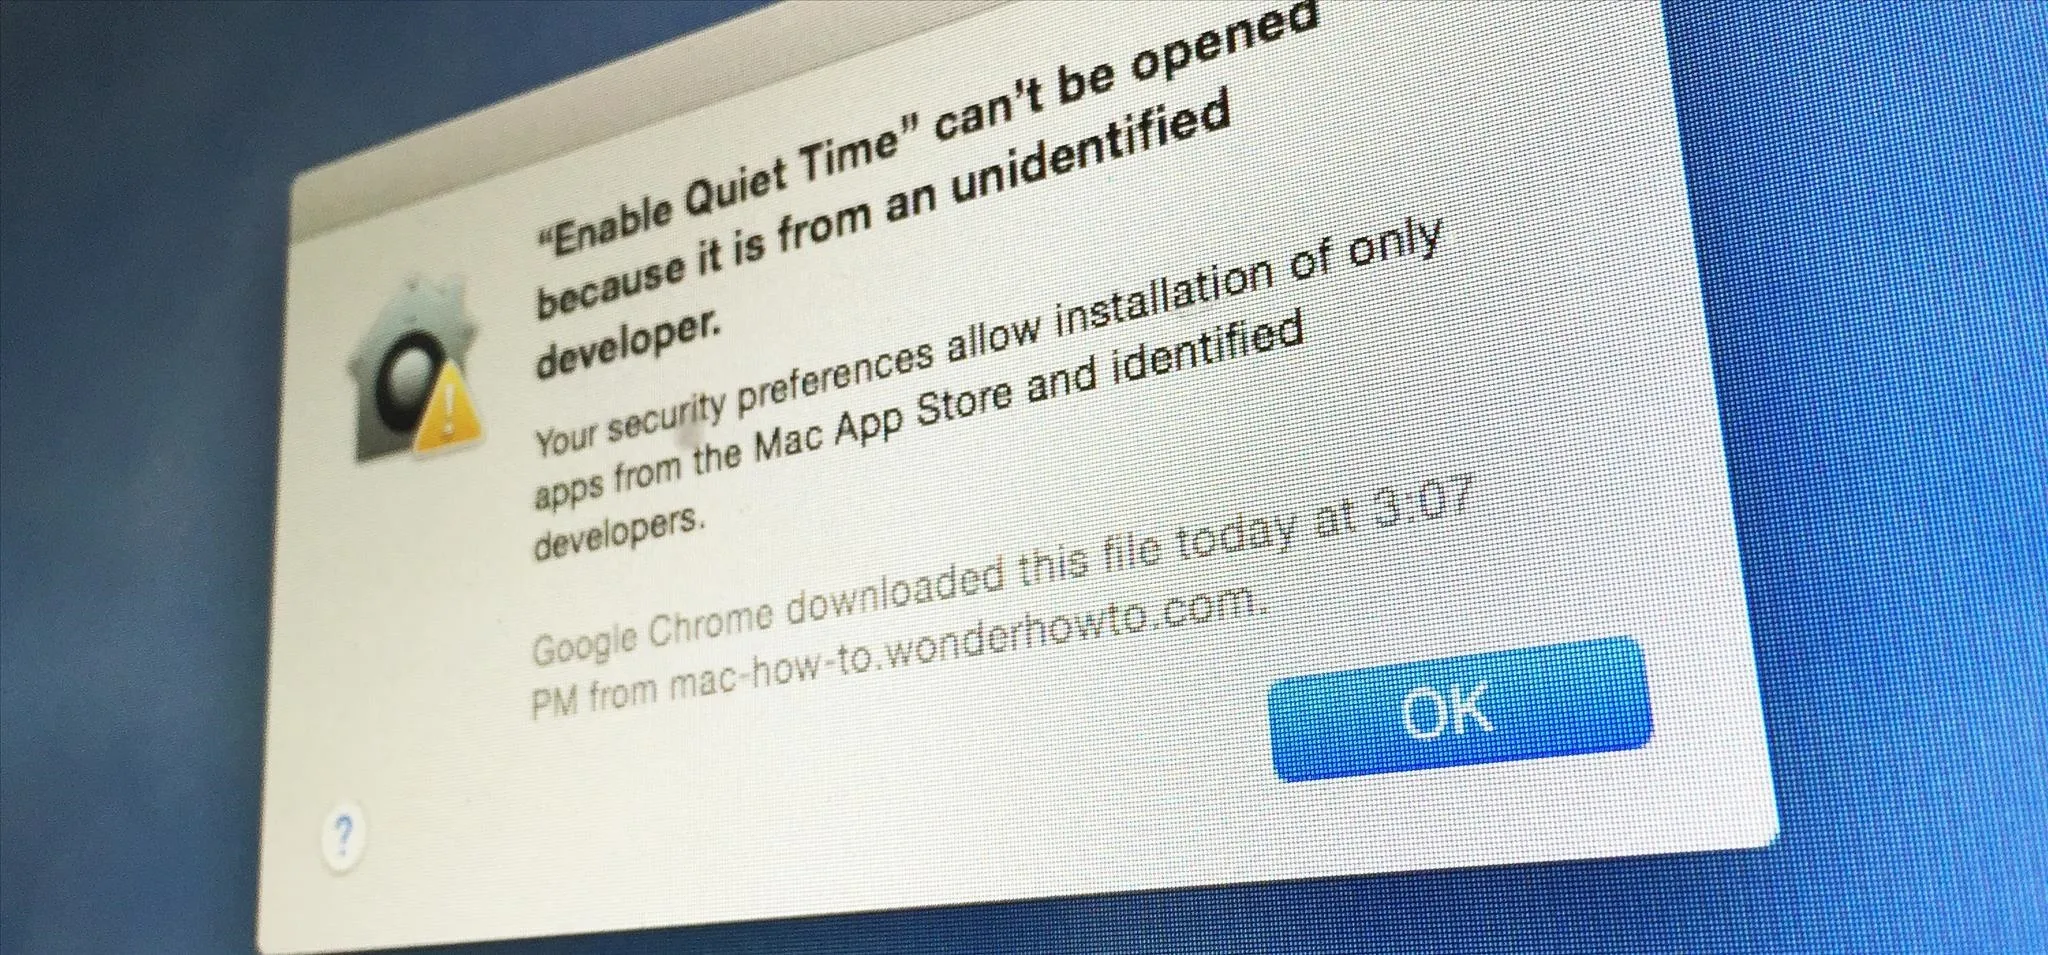
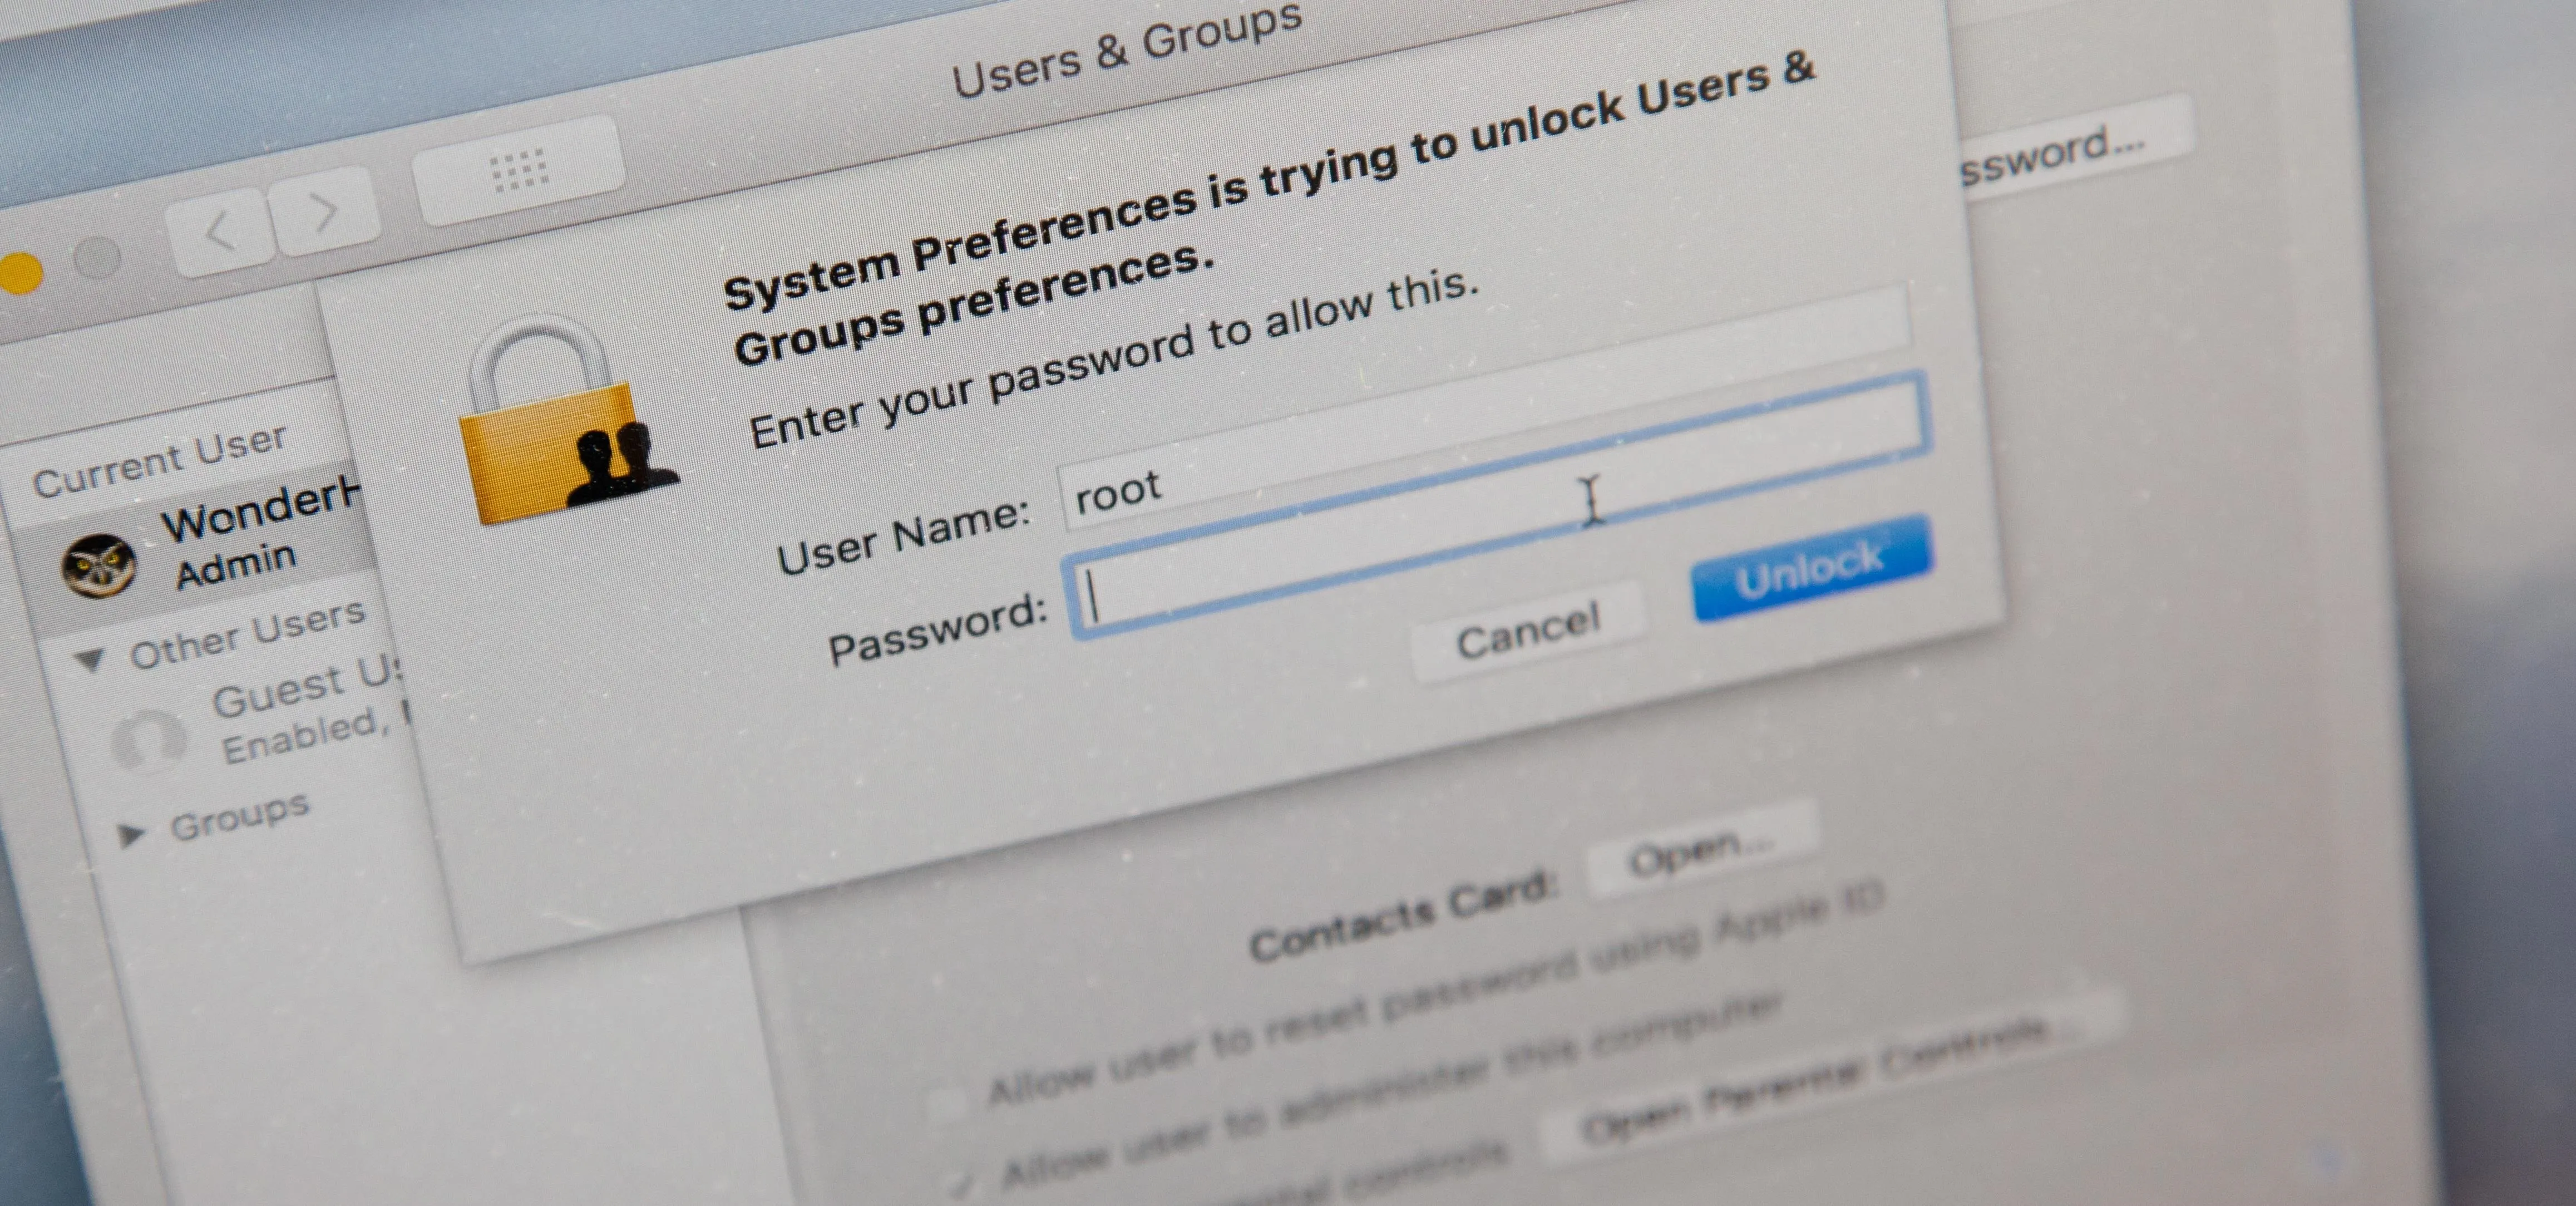
Note: If you have trouble running the app for the first time, your security settings for installing apps in Mac OS X probably blocked it, so make sure to change your Gatekeeper settings or allow a one-time exception.
Customize (Optional)
Creating a standard definition (480p/360p) video file makes for faster encodes and greater compatibility, but you may require a different resolution (e.g., 720p or 1080p). If that's the case, a quick customization can give you the results you're looking for.
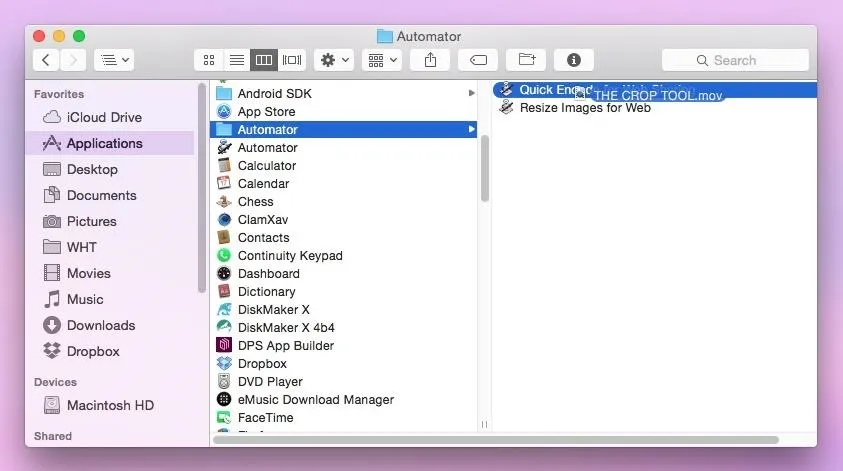
First, open this app in Automator. You can do that by locating Automator in your Applications folder and simply dragging this app onto it. When it opens up, you'll see that there's only one action in the entire process, so there's not much to change.
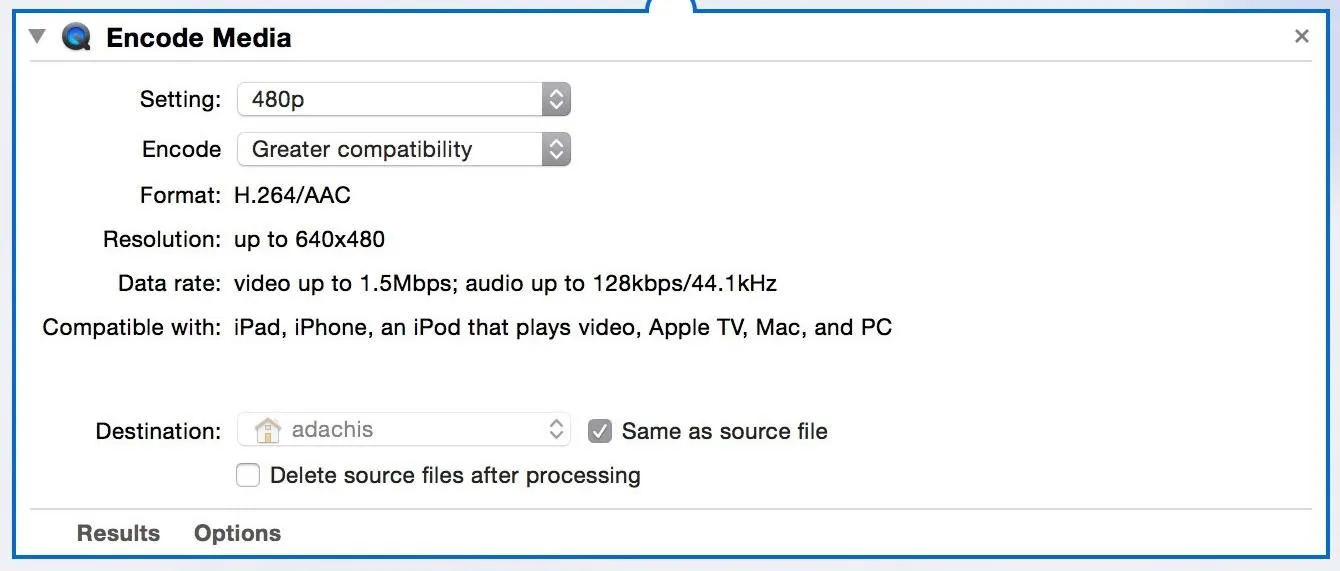
Just click on the "Setting" drop-down menu and choose 720p, 1080p, or whichever other setting you prefer. When you're done, save your changes and the app will use your new settings instead.
If you want multiple options, you can just duplicate the app and change the settings. This way you can create drag-and-drop apps that can encode at different sizes. Just renamed each app accordingly so you know which one is which.


Comments
Be the first, drop a comment!