Work, school, and everything in between keeps us pretty busy—so much so, that sometimes we run out of the house with our shirts on backwards, our headphones misplaced, and our computers running all day long.
While I can't help you with the first two problems, I can definitely give you advice on how to make sure you never leave your computer on when you're not using it. You know you can easily schedule your Mac to not only shut down, restart, or go to sleep at a certain time, but also turn on and wake up for when you need it ready.
How to Schedule Your Mac with Energy Saver
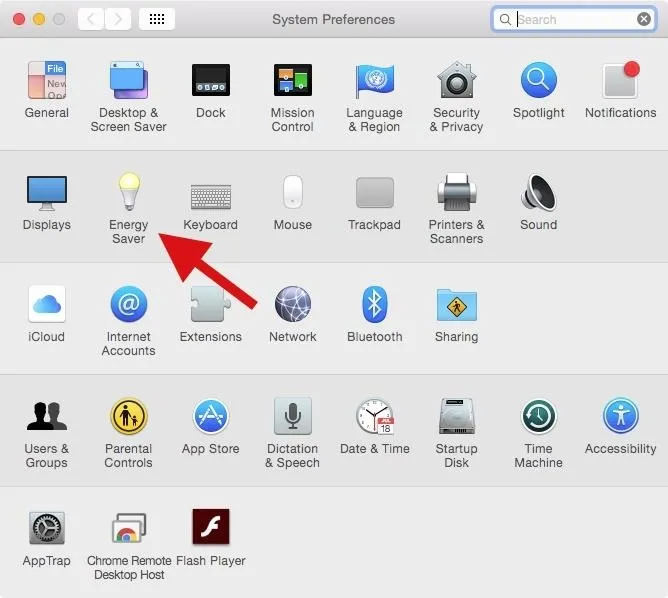
- Open your System Preferences and click on Energy Saver.
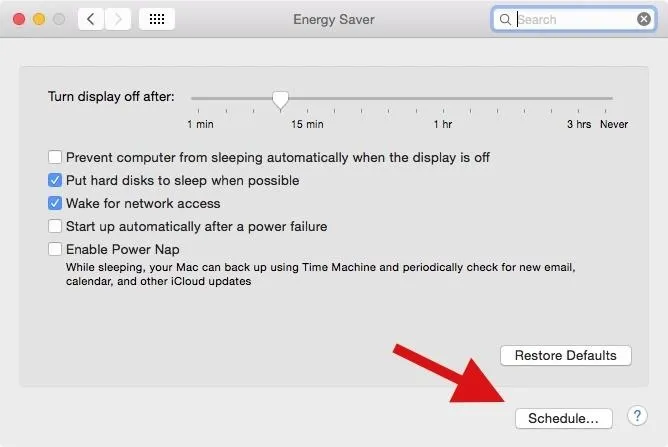
- In Energy Saver, click on the Schedule option at the bottom right.
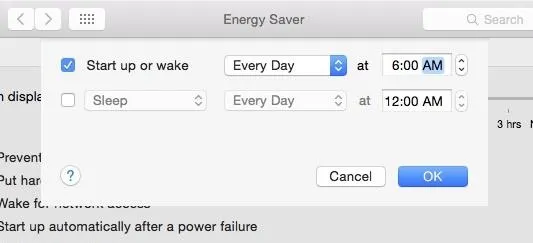
- To schedule your Mac to either start or wake up, check the box at the top, select which day you want it to turn on (or select every day), then select the time.
- To schedule your Mac to fall asleep, restart, or shut down at a certain time, check the second box, select which option you want (you can only choose one), then choose the day and time.
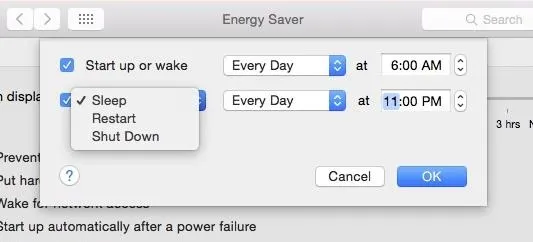
- Once you're finished, hit OK and your Mac operations are now scheduled. For a scheduled shutdown, restart, or sleep, a notification will appear at the scheduled time.
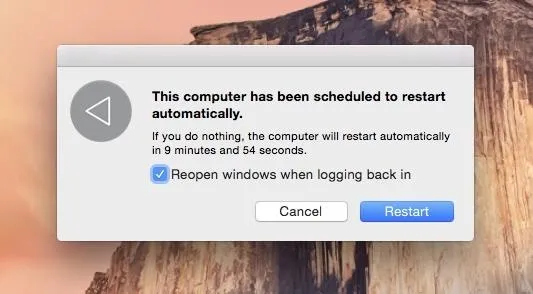
Disable all schedules by going back to Energy Saver and unchecking the boxes next to the options you adjusted in the fourth step.
More Mac Tips You'll Probably Like
- Override Your Sleep & Screen Saver Settings from the Menu Bar
- How to Keep Your MacBook Awake with the Display Closed
- How to Optimize Your Mac for the Best Gaming Experience Possible
- Open Apps Faster on Your Mac Using Custom Keyboard Shortcuts
- 6 Ways to Get More Out of Your Mac's Notification Center
Follow Apple Hacks over on Facebook and Twitter, or Gadget Hacks over on Facebook, Google+, and Twitter, for more Apple fun.

















Comments
Be the first, drop a comment!