


When most people think of "gaming computers," they're probably thinking of Windows-based PCs. They offer a huge variety of devices with better equipped software and hardware for a cheaper price, and there are more available games than there are for OS X-based systems.
But that's not to say that you have to replace your Mac with a Windows computer in order to improve your gaming experience. In this guide, I'll be going through several tips you can use to optimize your Mac to have the best gaming experience possible without switching to the dark side.
#1: Check Your Mac's Existing Settings
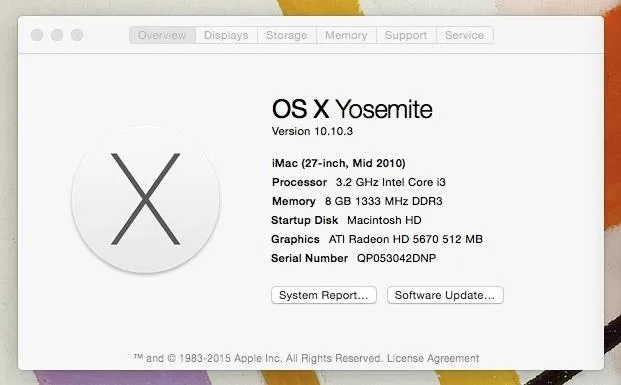
Before you install a game, make sure you're well acquainted with the various aspects of your Mac, including the OS, processor, memory, available hard drive space, and graphics card. On OS X, you can view all of these by clicking on the Apple icon in the menu bar and going to "About This Mac."
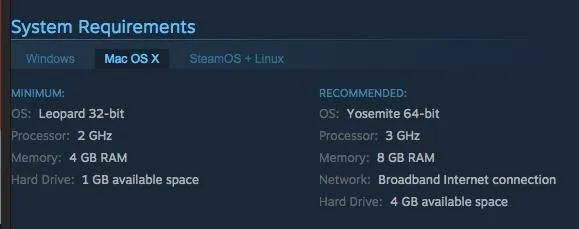
It's important to know this information because every game comes with minimum and recommended system requirements. For example, in Steam, you'll find these requirements at the bottom of the game listing as "System Requirements." With other online games or physically-purchased ones, you should find these same requirements on the box, in a manual, or on the affiliated website.
While minimum requirements are okay to have, I suggest that you push for recommended requirements, even if that means updating your OS or deleting files from your hard drive to clear space.
#2: Make Sure Your Hard Drive Has Enough Free Space
As a rule of thumb, you should never let your your startup disk drop below 15% available storage. Once below that threshold, your computer begins to slow down because background processes and apps that need available storage don't have that available, so they cannot work at an optimal level. This is a no-no if you want a game to run flawlessly.
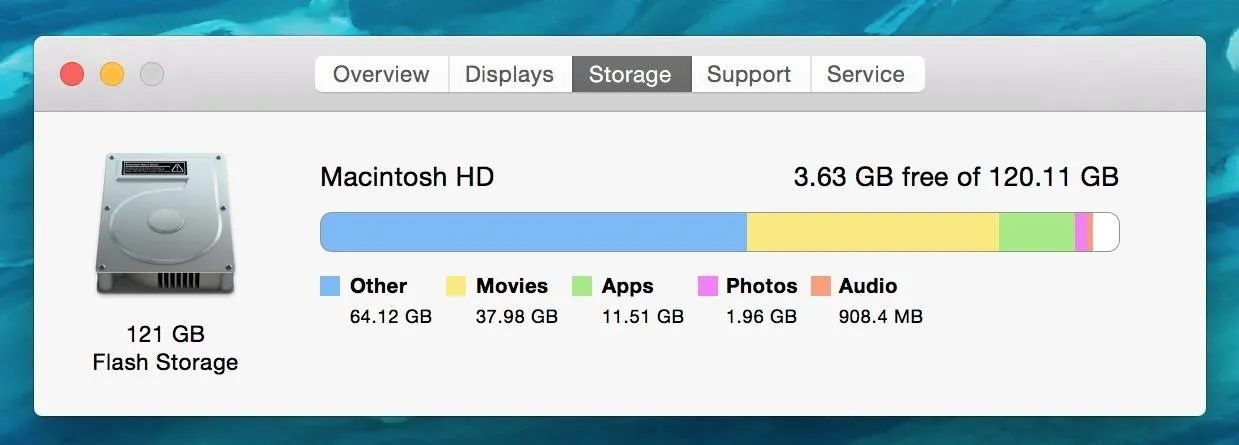
As you can see below, my MacBook Pro only has 3.63 GB of available storage, which amounts roughly to 3% of free storage (yikes). In order to prevent issues, I should have around 18GB (15%) of memory available.
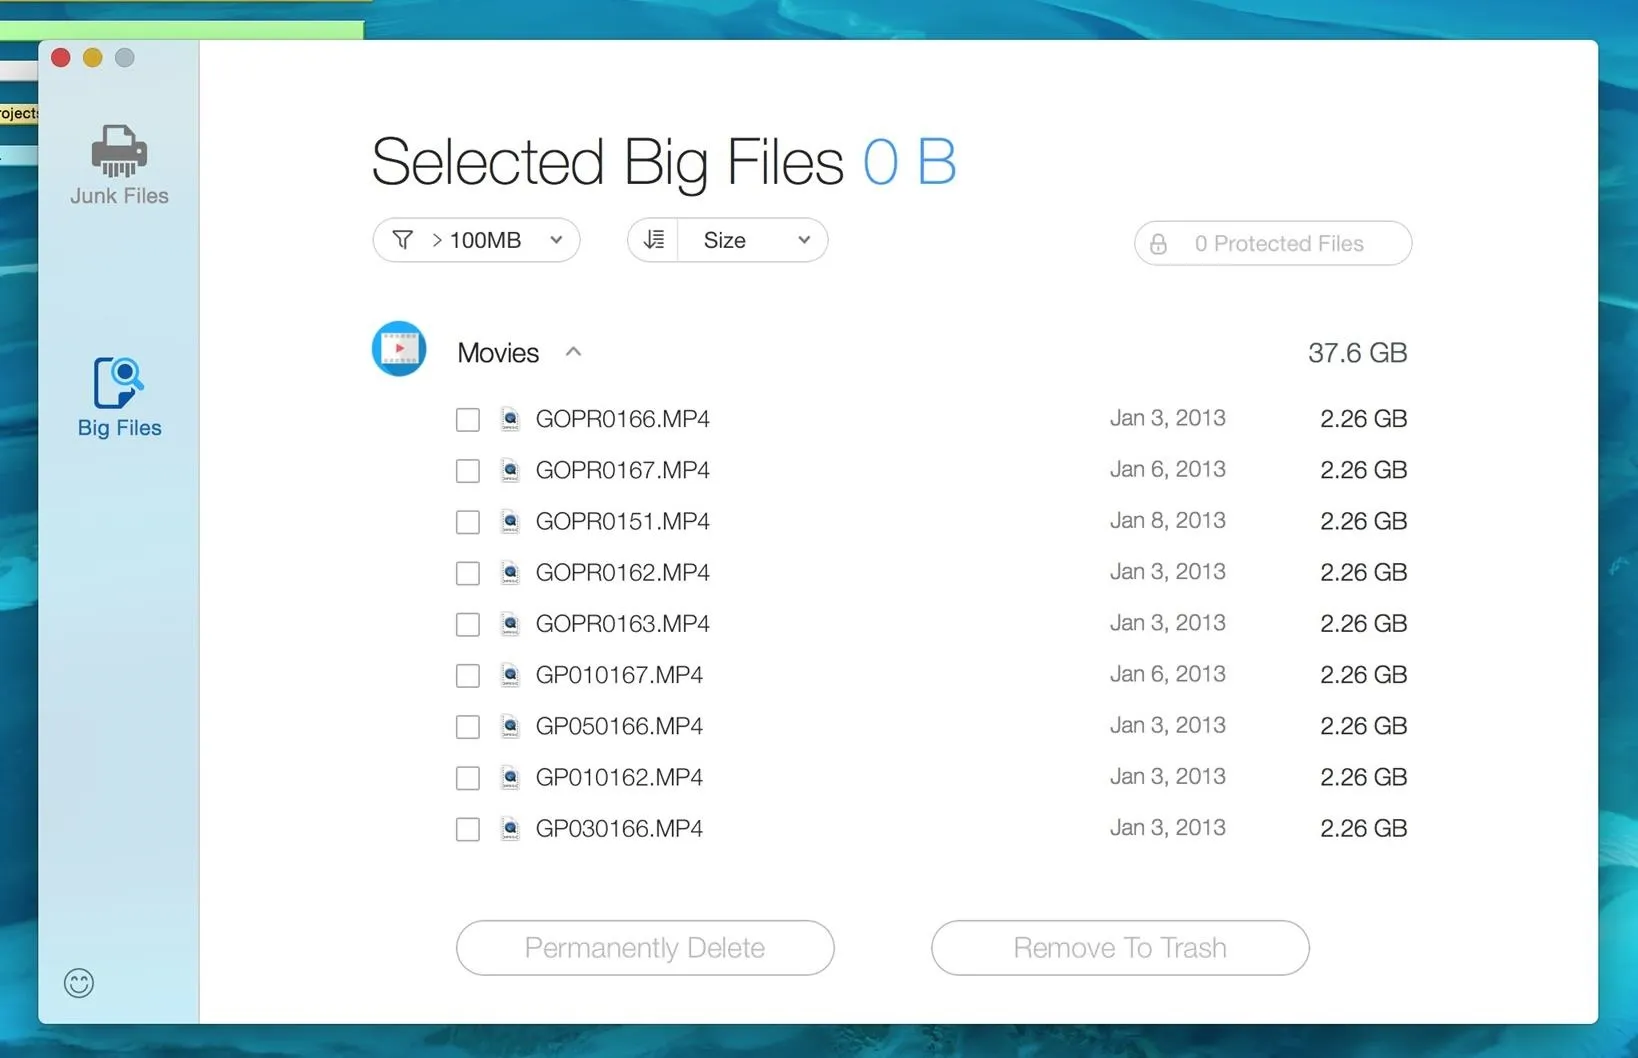
Clear up space by getting rid of rarely used applications, duplicate files, and everything in your trash. If you're having trouble finding what to get rid of, download something like Dr. Cleaner or Monolingual, which help you automatically find files that you can safely delete from your Mac.
Using Dr. Cleaner, I was able to find almost 38 GB of files that I could quickly get rid of, mostly made up of old GoPro videos I forgot I had saved. Deleting all these files put me at 41 GB, or 34%, of available disk space.
If there's still not enough room on your hard drive, check out our guide on how to completely uninstall apps on Mac OS X, which will show you how to not only get rid of an app, but all the files associated with it as well.
#3: Close All Open & Menu Bar Apps
Heavier apps such as web browsers (looking at you Chrome) and movie editors use up a ton of system resources, leaving less available memory for other tasks. All of this affects system performance, so before you start playing games, make sure to quit from resource-heavy apps in your dock.
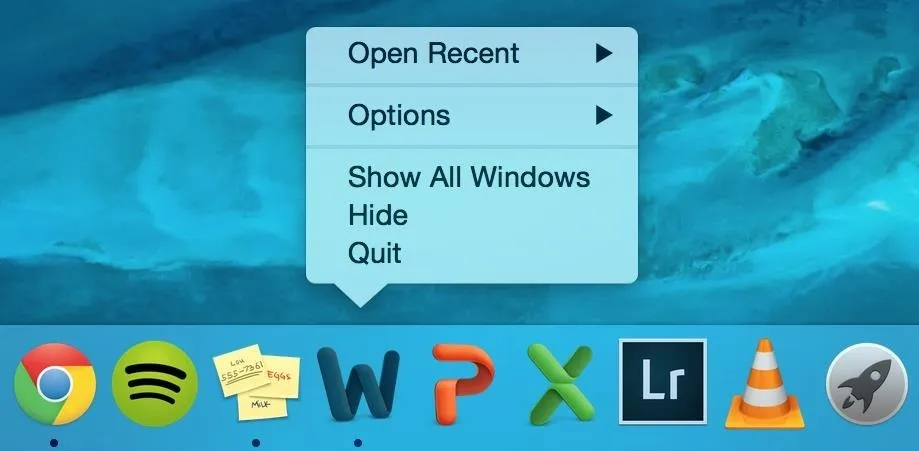
Also make sure to close or quit from menu bar apps, which always run in the background.

The less amount of open apps taking up memory, the more responsive your Mac will be, making gameplay that much better.
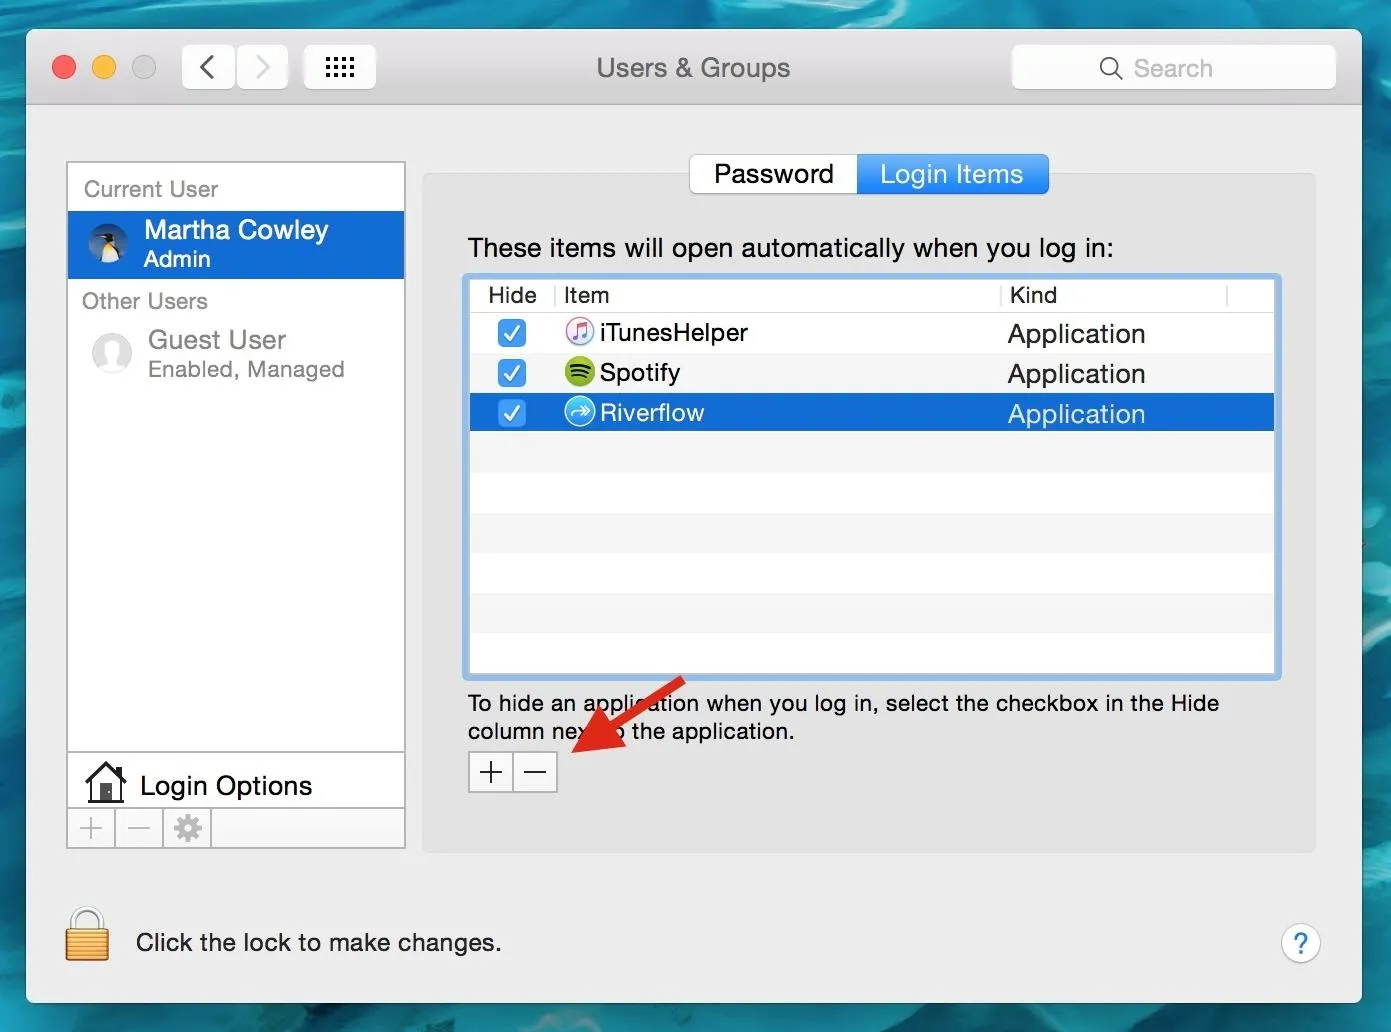
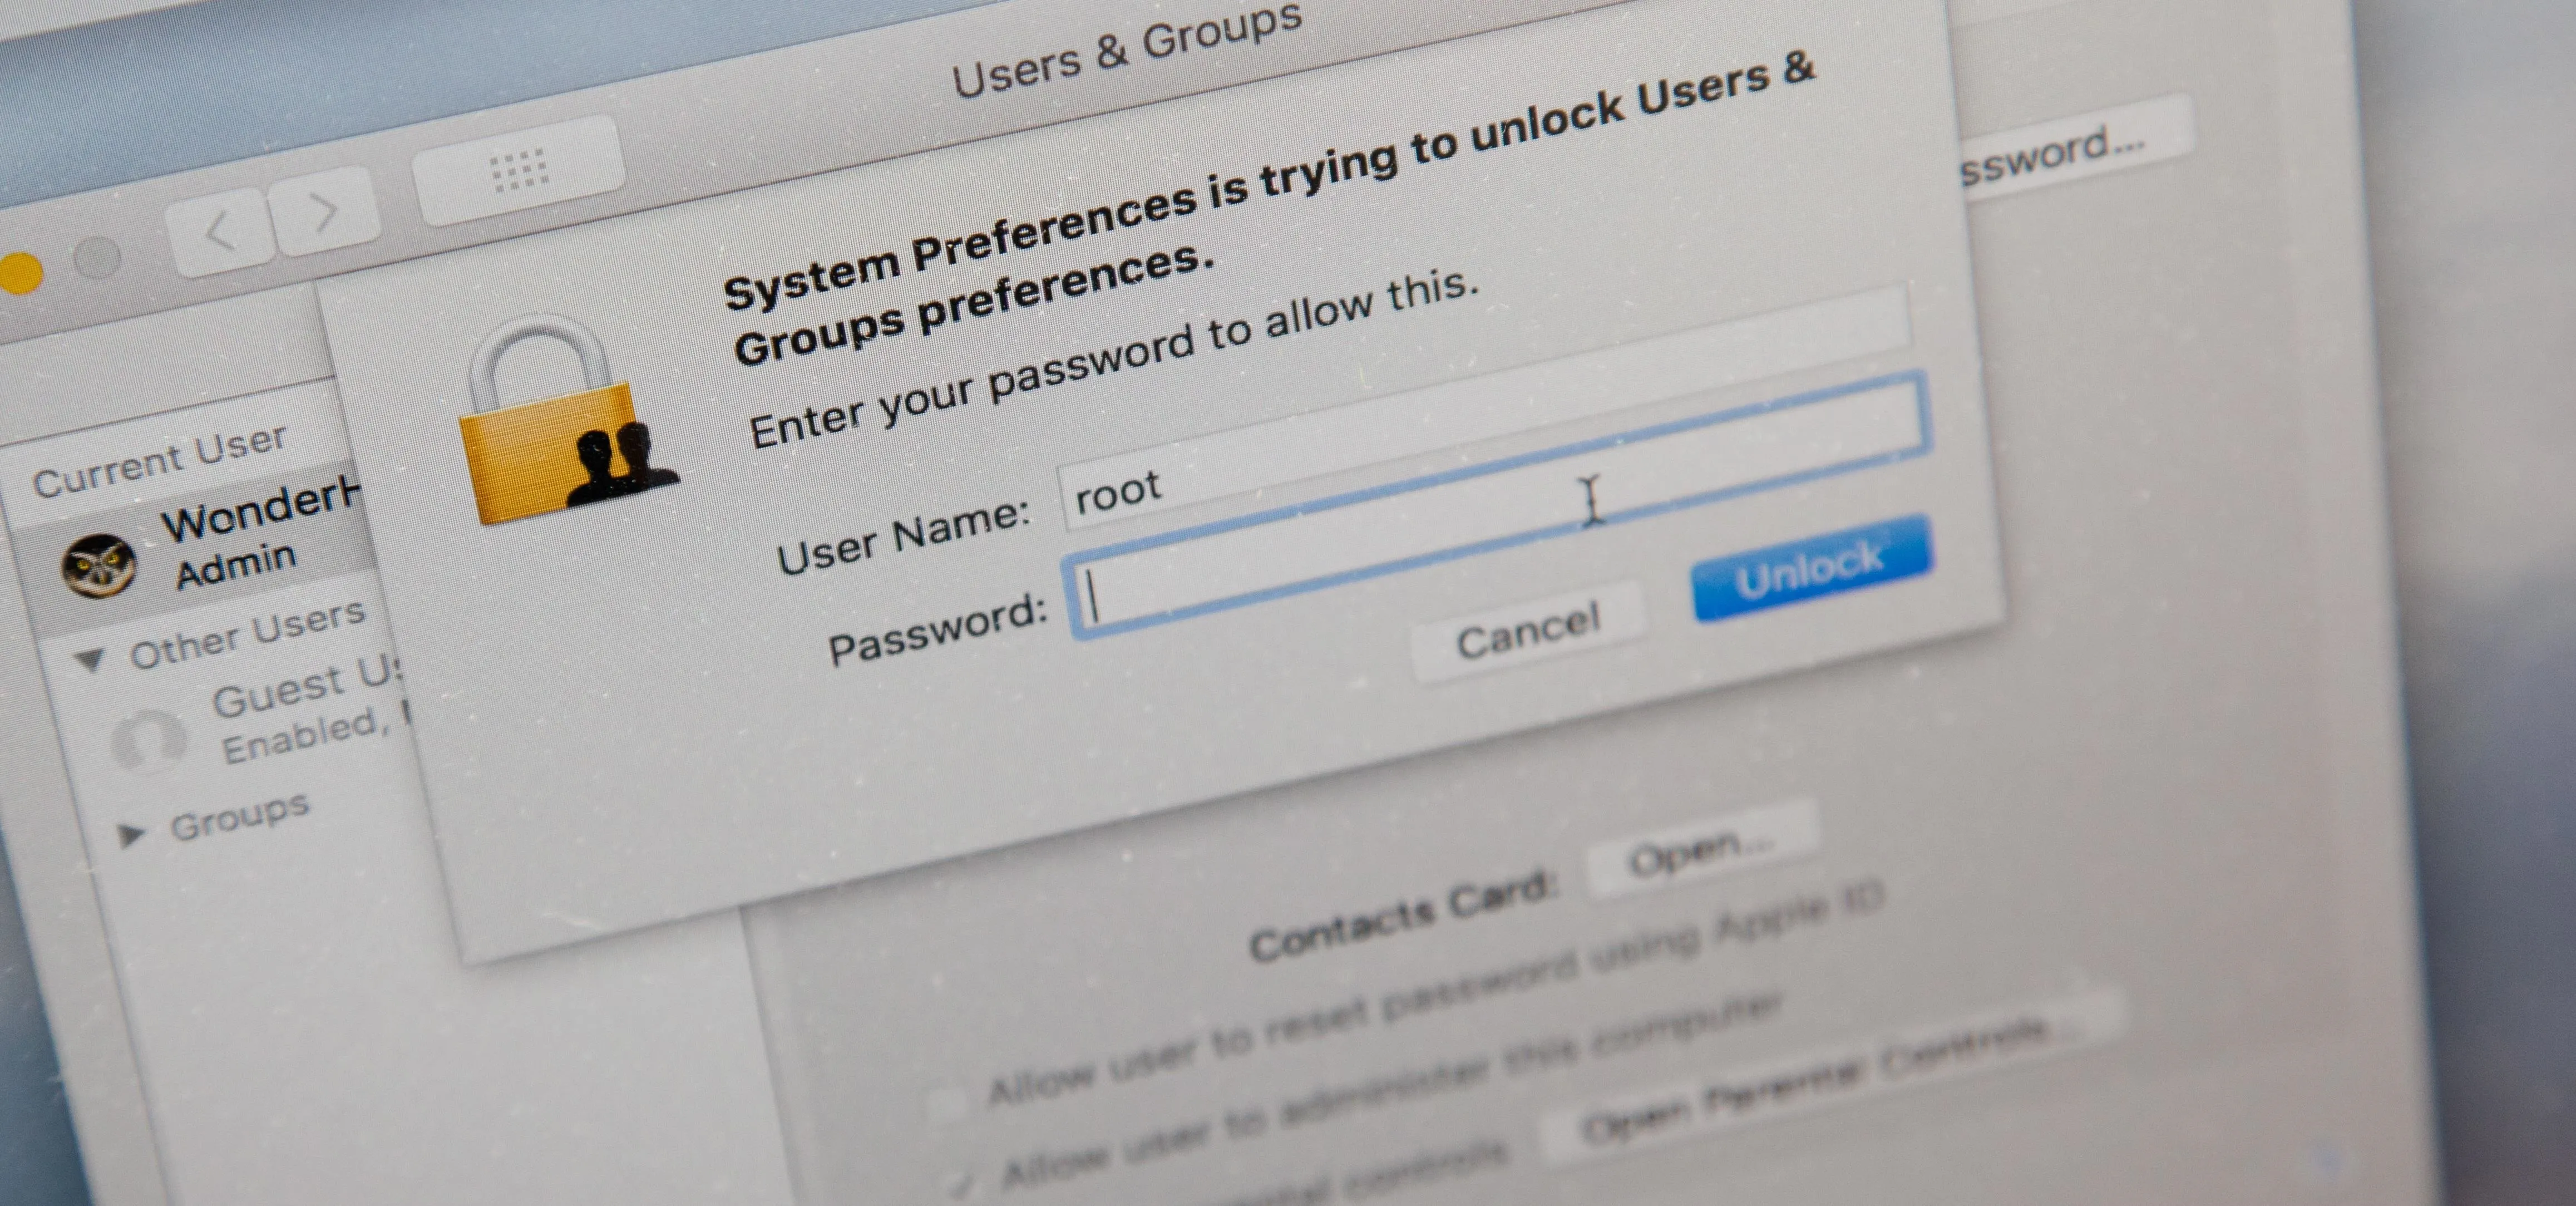
#4: Stop Apps from Opening Automatically When You Log In
Every time you log in to your Mac, a handful of apps open automatically, using resources before you even do anything. Stop all apps from auto-starting by going to System Preferences -> Users & Groups, then click on "Login Items," select an app (or all of them), and hit the minus sign underneath.
#5: Disable Dashboard or Notification Center (Wait)
Two native OS X features that I never use are Dashboard and Notification Center. The problem with that is that they take up processing power and RAM that could otherwise be used towards gaming. Luckily you can disable both of them using Terminal.
Notification Center
To disable Notification Center, open Terminal and enter the following two commands from Pastebin, one by one, in this order:
You will no longer receive alerts, banners, and notifications for any apps in your Notification Center. To get Notification Center back on your Mac, open Terminal and enter the following command from Pastebin.
Then go to /System/Library/CoreServices/ and double-click on Notification Center to launch it.
Dashboard
Similarly, you can disable Dashboard through Terminal by using the following command on Pastebin.
Your dock will disappear for a bit and Dashboard will be gone. You can bring Dashboard back with the following command on Pastebin.
#6: Make Sure All of Your Software Is Up to Date
Updates to your software include both bug fixes and new features that affect the way your computer runs, including the games that you play on it.
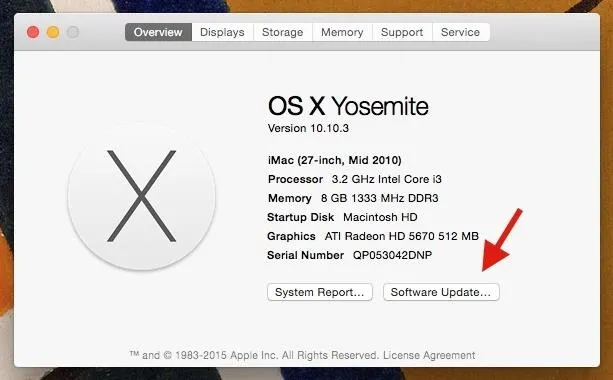
On OS X, check for updates by clicking on the Apple icon in the menu bar, then "About This Mac." Click on "Software Update..." and the Mac App Store will open, where you can update all of your computer's software, including your operating system (I'm using Yosemite, but could update to El Capitan).
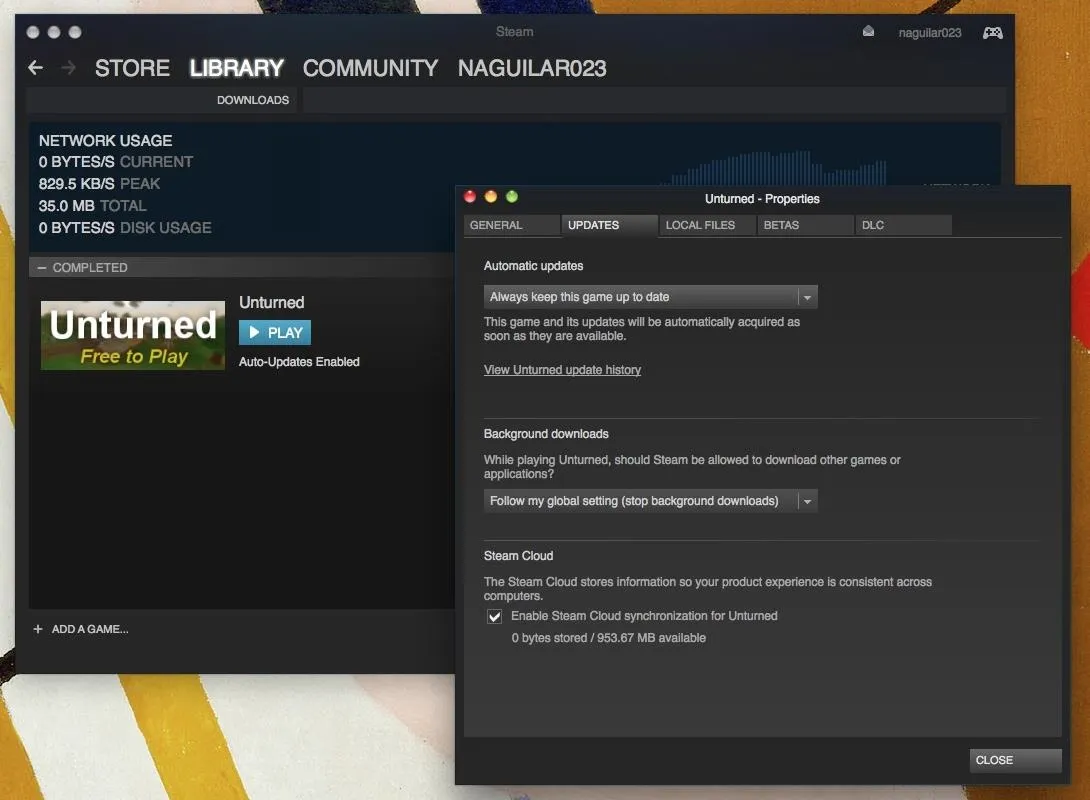
If you use Steam, it's also a good idea to update all of your games, which provide patches, updates, and new game installs that improve the way they run. Just go to "Library" and check which games need to update (unless you have auto-updates enabled, then you're fine).
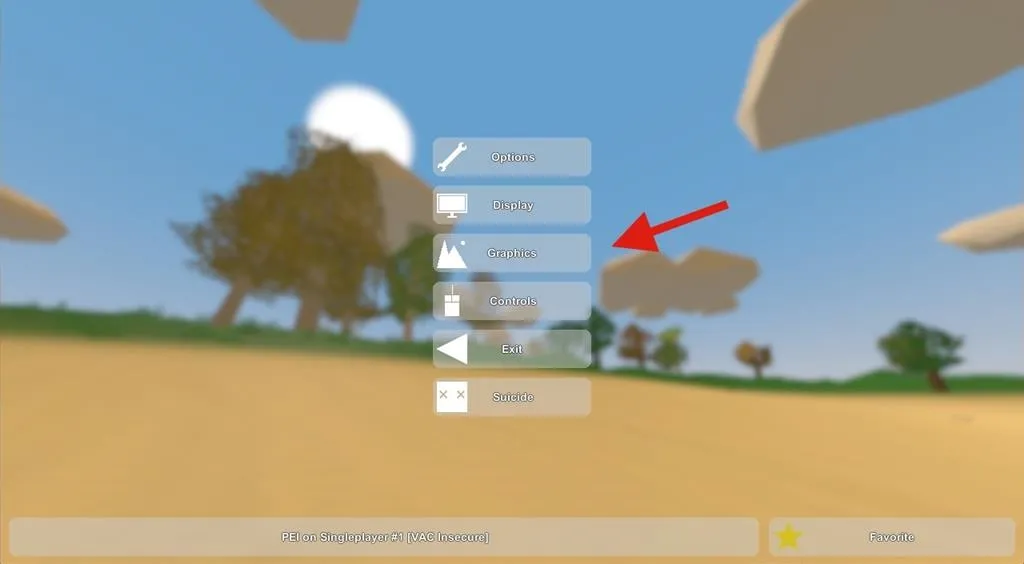
#7: Configure Game Settings
Each game you play has graphic settings that you can customize to add more details to the background, let you see further, and more. Usually you'll find these settings in the game menu under "Graphics."
As you can see below, many features like motion blur and sun shafts are disabled, because I don't really care for them, as they tend to cause a significant amount of lag because they constantly need to be updated and drawn. Ultimately it's up to you to choose which graphics settings are worth keeping, since all will affect game performance one way or another.
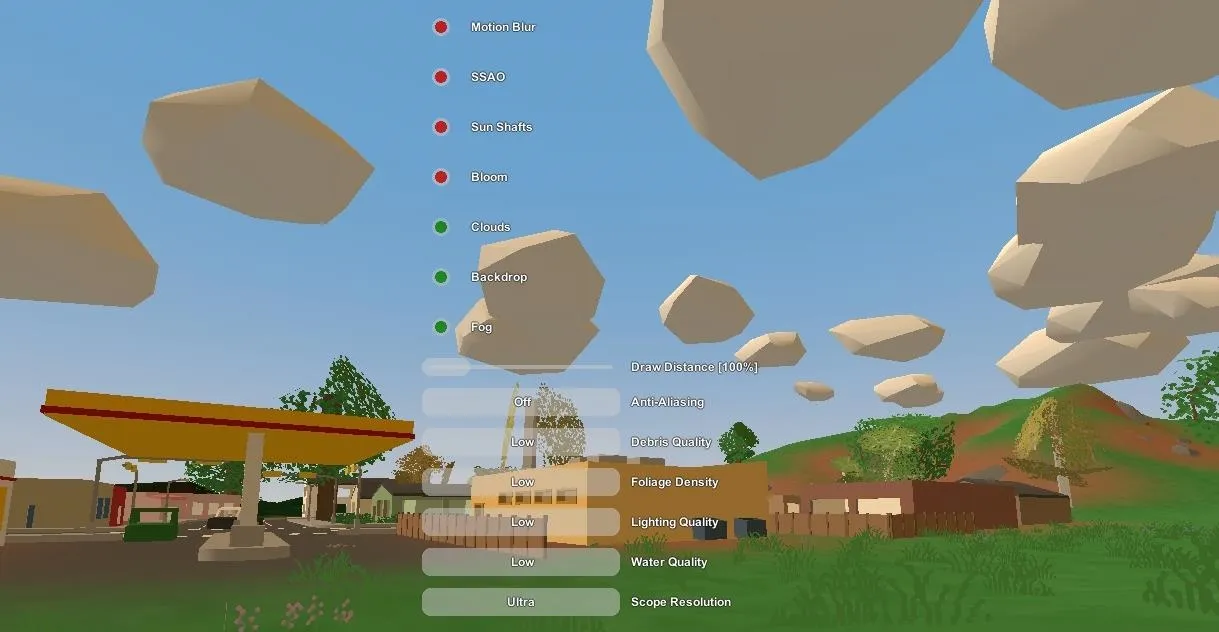
You can also change the quality of certain graphics, which can range anywhere from low to high. Mess around with these to see which affect gameplay the most.
#8: Try Both Windowed & Full Screen Mode When Playing
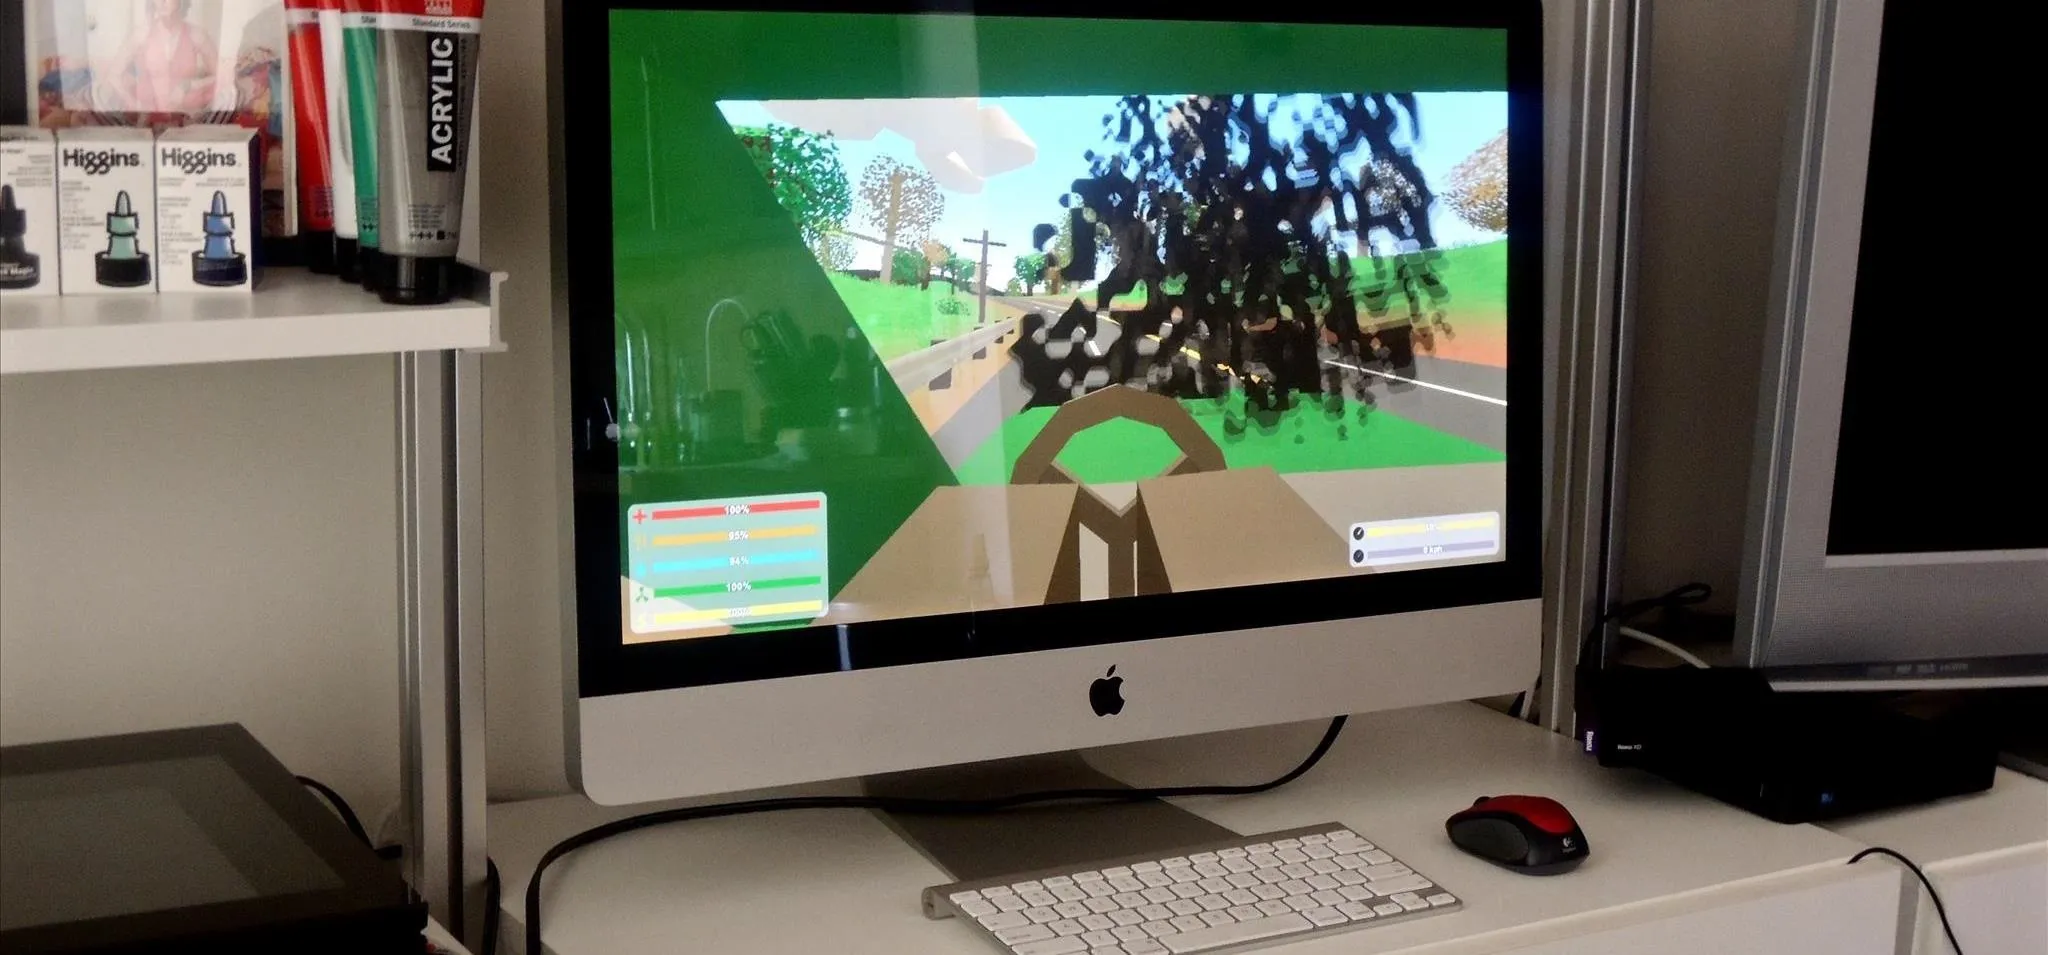
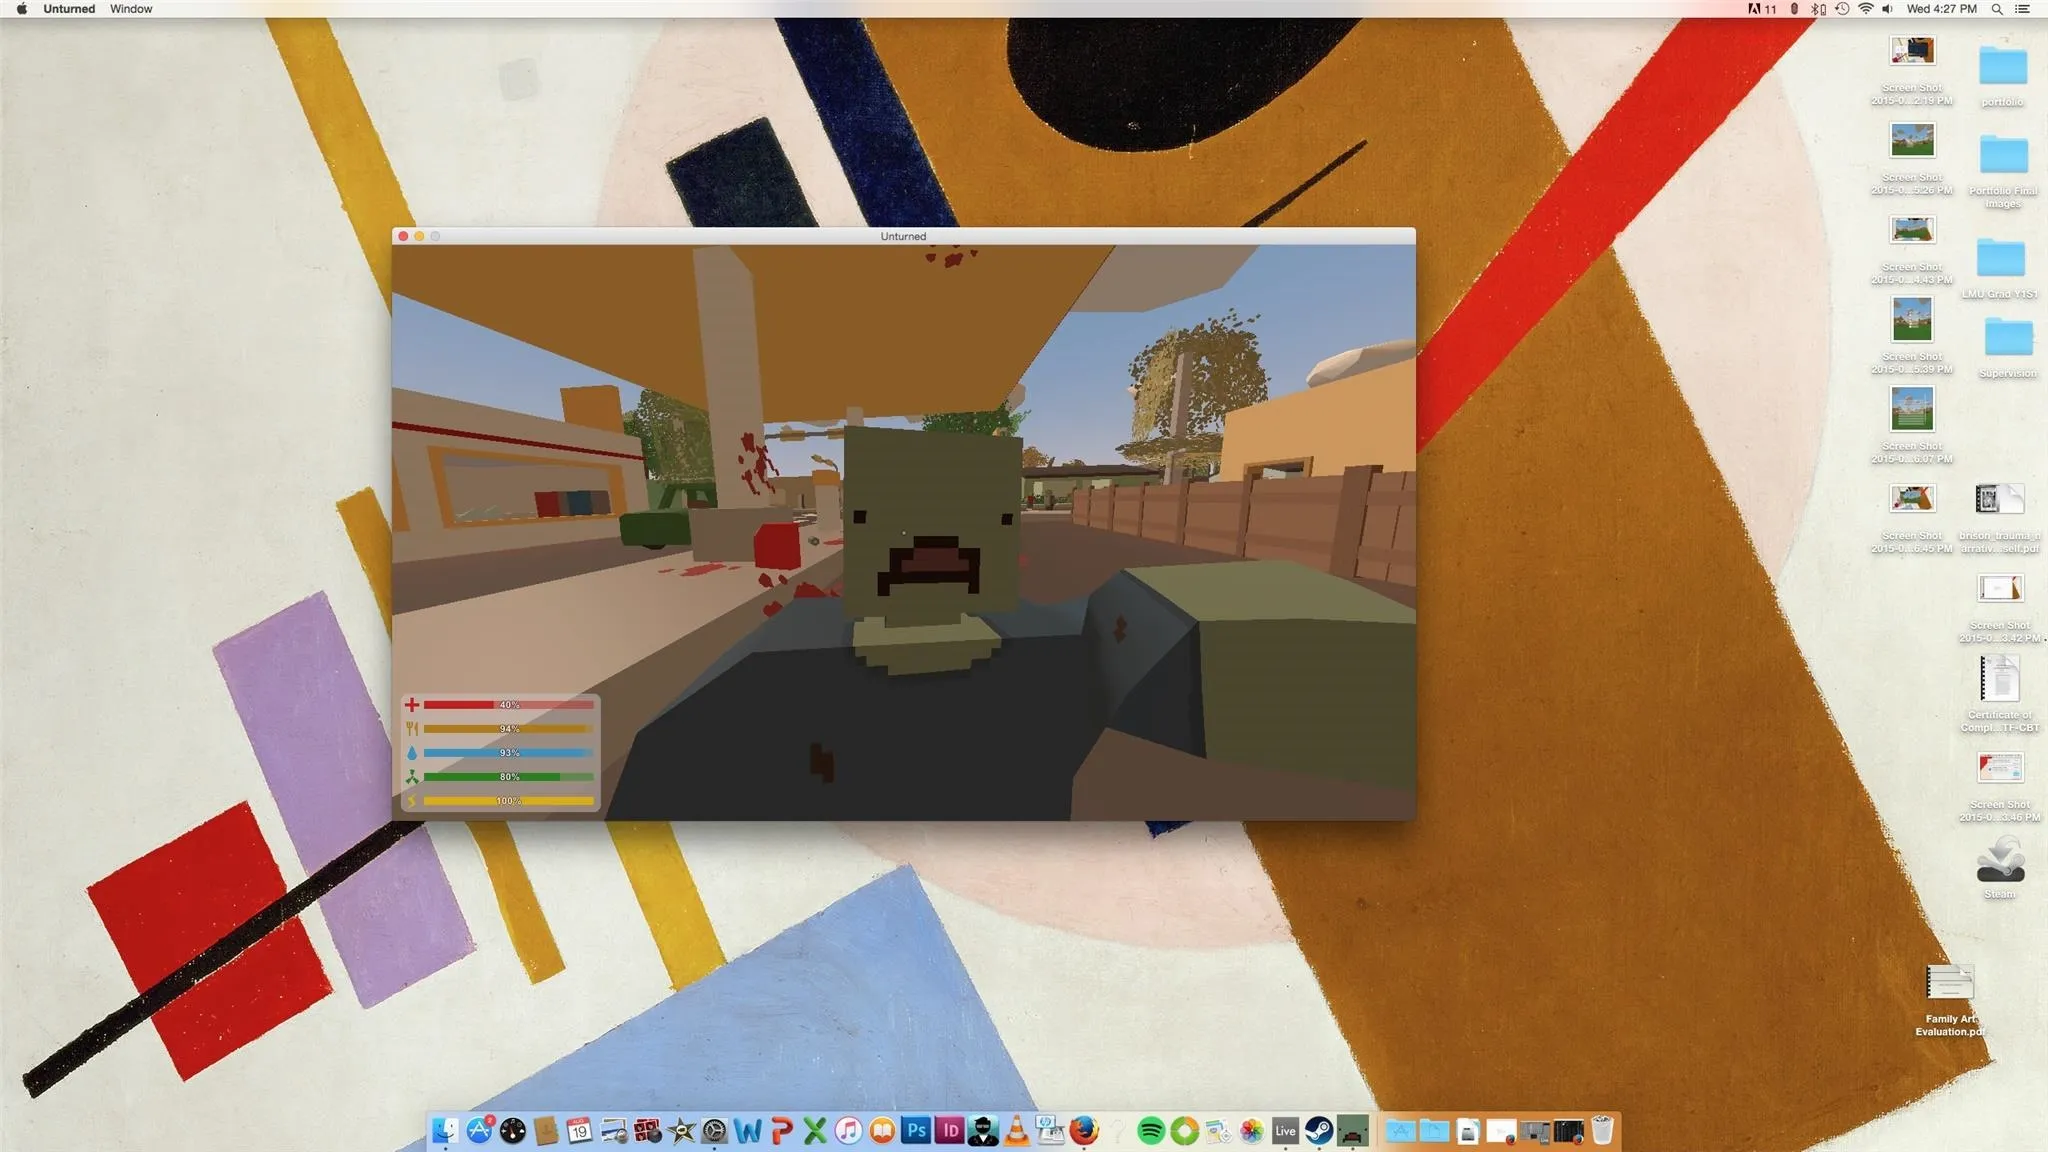
Believe or not, playing in different view modes can affect gameplay. I tested out a few games from Steam, in both windowed (seen below) and full screen modes, getting mixed results in how well the game played.
Some games slowed down a bit when the window was too small, but others also slowed down when I went into full screen mode. Try out all the options possible to see which works best for you.
#9: Use Windows to Play Games
Last but certainly not least, you can always use Windows on your Mac to play all of those games unavailable on OS X. Using Boot Camp Assistant, you can dual boot Windows 10 on your Mac to play all the Windows games you want.
Do you have any other tips to add that have made your gaming experience on Mac better? Let us know in the comments below!
Follow Apple Hacks over on Facebook and Twitter, or Gadget Hacks over on Facebook, Google+, and Twitter, for more Apple tips.


Comments
Be the first, drop a comment!