


![UN PREVIEW [Explicit]](https://m.media-amazon.com/images/I/611RTr3tYnL._AC_UY218_.jpg)

There are plenty of useful shortcuts in Mac OS X, but not all of them are necessarily simple. You can use one of built-in shortcuts to take many different kinds of screenshots, but the shortcuts can be rather annoying to use because they require at least three different keys, which can be a little awkward to perform.
Turns out, you can easily take screenshots from the Preview application on your Mac. With the Preview app open, all you have to do is go to File -> Take Screen Shot, which gives you the option to capture the current window, the entire screen, or only a certain part of it.
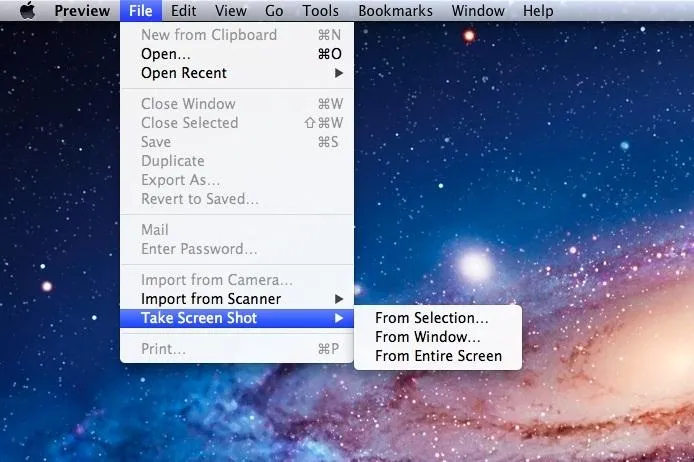
If you choose From Entire Screen, there's a handy 10 second countdown to give you time to move things around and make sure you get the shot you want.

Pressing the Control key while you take a screenshot copies the image to your clipboard. Otherwise, captures are not automatically saved to your desktop like they are when you use the shortcut keys, which automatically create .png files on your desktop.
Instead, Preview lets you manually save them so that you can name them, save them wherever you like, or get rid of them if they don't turn out how you want. It also lets you immediately start editing since it's already open in Preview.
This is one case where a shortcut may not be the quickest way to get something done. Which method do you prefer? Know of any other tips or tricks? Let us know in the comments below.


Comments
Be the first, drop a comment!